|
本帖最后由 hochikong 于 2014-7-28 15:15 编辑
问题导读:
1.什么是Trove?
2.如何把Trove服务做成系统服务?
3.如何通过命令行方式创建Trove实例?

关于 Trove 这个 DbaaS 项目介绍可以看官方 wiki 里介绍。本文主要目的就是把 Trove 能安装上、并且用起来。
详见:https://wiki.openstack.org/wiki/Trove
同时 Trove 有一个项目专门负责安装 Trove-integration,基本上通过几条命令就可以安装好一个 trove 环境,装了几次,一直没能成功的创建过一个 db instance。
这个项目会自动把 devstack 安装一遍,然后安装 trove,build 一个镜像,上传到 glance 镜像库中,网络好有耐心的朋友可以尝试一下:https://github.com/openstack/trove-integration
Trove 默认把数据库目录挂载到了 cinder 卷上面,同时备份的数据库会存放到 swift 对象存储中,也可以选择使用 heat 模版,对其它组建依赖性比较强,本文是基于一个 icehouse openstack 环境上(包含所有的核心项目)扩展了 trove。
目录:
- 1 下载,安装包
- 2 创建 Trove 用户
- 3 配置 Trove
- 3.1 事先准备
- 3.2 trove-api 配置
- 3.3 trove-conductor 配置
- 3.4 trove-taskmanager 配置
- 3.5 同步数据库
- 3.6 制作系统服务
- 3.7 启动服务
- 3.8 自定义 heat 模版
- 4 定义 Trove
- 5 命令行方式创建 trove 实例
- 6 界面创建方式 trove 实例
下载、安装包
先把 trove 的源代码下载下来:
- git clone https://github.com/openstack/trove.git /opt/trove
- git clone https://github.com/openstack/python-troveclient.git /opt/python-troveclient
安装 troveclient:
- cd /opt/python-troveclient
- python setup.py egg_info
- pip install -r python_troveclient.egg-info/requires.txt
- python setup.py develop
安装 Trove icehouse release:
- cd /opt/trove
- git checkout stable/icehouse
- python setup.py egg_info
- pip install -r trove.egg-info/requires.txt
- python setup.py develop
创建 Trove 用户 我使用了环境变量,省得敲一堆 –os 参数,而 trove 的租户最好和 nova 的租户相同,trove 会使用 nova-compute 资源,下面用来创建 trove 用户:
- keystone user-create \
- --name=trove \
- --pass=password \
- --tenand-id=$(keystone tenant-get service | awk '/ id / {print $4}') \
- --email=trove@thstack.com
给 trove 用户添加 admin 角色:
- keystone user-role-add --tenand-id=$(keystone tenant-get service | awk '/ id / {print $4}') \
- --user-id=$(keystone user-get trove | awk '/ id / {print $4}') \
- --role-id=$(keystone role-get admin | awk '/ id / {print $4}')
创建 trove 服务,类型为 databases:
- keystone service-create --name=trove --type=database --description='OpenStack Trove Service'
给 trove 服务添加 api 访问地址:
- keystone endpoint-create --region RegionOne \
- --service-id=$(keystone service-get trove | awk '/ id / {print $4}') \
- --publicurl 'http://127.0.0.1:8779/v1.0/$(tenant_id)s' \
- --adminurl 'http://127.0.0.1:8779/v1.0/$(tenant_id)s' \
- --internalurl 'http://127.0.0.1:8779/v1.0/$(tenant_id)s'
配置 Trove事先准备 创建 trove 需要的目录: - mkdir /etc/trove /var/log/trove /var/lib/trove
使用 mysql 作为 trove 后端 db:
- mysql -uroot -p
- > create database trove default character set utf8;
- > grant all on trove.* to 'trove'@'localhost' identified by 'trove';
指定 trove 使用的 neutron 网络: 如果还没有创建网络,需要用 admin 账号创建一个共享的外部网络和一共享的内部网络,接上路由器。
目前 trove 在 horizon 上还不支持选择网络,只能在配置文件中指定一个网络 id。 - neutron net-list
- +-----------------------------------------------------+------------------+-------------------------------------------------------------------------------+
- | id | name | subnets |
- +-----------------------------------------------------+------------------+-------------------------------------------------------------------------------+
- | 30190693-9150-46e1-af48-9ab90fbd4a3e | Public | 947c4e3e-ab1e-46b8-b5a1-1c238828e776 192.168.8.0/24 |
- | 9cbae051-78c7-4574-968e-2cb9b0f410ad | Internal | fded8a32-f850-4e2e-8532-3326872204a7 10.0.0.0/24 |
- +-----------------------------------------------------+------------------+-------------------------------------------------------------------------------+
从上面网络信息中把内部网络的 id 号提取出来,在 trove.conf 中和命令行创建都会用到: - default_neutron_networks = 9cbae051-78c7-4574-968e-2cb9b0f410ad
trove 三个服务的配置文件主要参考了 cfg.py 和 *.sample,虽然有些参数不太确定,但是目前服务运行正常. 下面的配置文件可能并不适合每个人,需要自己修改密码、ip 地址之类的。
- [composite:trove]
- use = call:trove.common.wsgi:versioned_urlmap
- /: versions
- /v1.0: troveapi
-
- [app:versions]
- paste.app_factory = trove.versions:app_factory
-
- [pipeline:troveapi]
- pipeline = faultwrapper authtoken authorization contextwrapper ratelimit extensions troveapp
- #pipeline = debug extensions troveapp
-
- [filter:extensions]
- paste.filter_factory = trove.common.extensions:factory
-
- [filter:authtoken]
- paste.filter_factory = keystoneclient.middleware.auth_token:filter_factory
- auth_host = 127.0.0.1
- auth_port = 35357
- auth_protocol = http
- auth_uri = http://127.0.0.1:5000/v2.0
- admin_user = trove
- admin_tenant_name = service
- admin_password = password
- # signing_dir is configurable, but the default behavior of the authtoken
- # middleware should be sufficient. It will create a temporary directory
- # in the home directory for the user the trove process is running as.
- signing_dir = /var/lib/trove/keystone-signing
-
- [filter:authorization]
- paste.filter_factory = trove.common.auth:AuthorizationMiddleware.factory
-
- [filter:contextwrapper]
- paste.filter_factory = trove.common.wsgi:ContextMiddleware.factory
-
- [filter:faultwrapper]
- paste.filter_factory = trove.common.wsgi:FaultWrapper.factory
-
- [filter:ratelimit]
- paste.filter_factory = trove.common.limits:RateLimitingMiddleware.factory
-
- [app:troveapp]
- paste.app_factory = trove.common.api:app_factory
-
- #Add this filter to log request and response for debugging
- [filter:debug]
- paste.filter_factory = trove.common.wsgi:Debug
/etc/trove/trove.conf 内容如下:
- [DEFAULT]
- # Show more verbose log output (sets INFO log level output)
- verbose = True
-
- # Show debugging output in logs (sets DEBUG log level output)
- debug = True
-
- default_datastore = mysql
- datastore_manager = mysql
- # Address to bind the API server
- bind_host = 0.0.0.0
-
- # Port the bind the API server to
- bind_port = 8779
-
- # Number of child processes to run
- #trove_api_workers=5
-
- # AMQP Connection info
- rabbit_host = 127.0.0.1
- rabbit_password = guest
-
- # SQLAlchemy connection string for the reference implementation
- # registry server. Any valid SQLAlchemy connection string is fine.
- # See: http://www.sqlalchemy.org/docs/05/reference/sqlalchemy/connections.html#sqlalchemy.create_engine
- # sql_connection = sqlite:///trove_test.sqlite
- sql_connection = mysql://trove:trove@127.0.0.1/trove?charset=utf8
- #sql_connection = postgresql://trove:trove@127.0.0.1/trove
-
- # Period in seconds after which SQLAlchemy should reestablish its connection
- # to the database.
- #
- # MySQL uses a default `wait_timeout` of 8 hours, after which it will drop
- # idle connections. This can result in 'MySQL Gone Away' exceptions. If you
- # notice this, you can lower this value to ensure that SQLAlchemy reconnects
- # before MySQL can drop the connection.
- sql_idle_timeout = 3600
- mysql.usage_timeout = 600
-
- # Maximum line size of message headers to be accepted.
- # max_header_line may need to be increased when using large tokens
- # (typically those generated by the Keystone v3 API with big service
- # catalogs)
- # max_header_line = 16384
-
- #DB Api Implementation
- db_api_implementation = "trove.db.sqlalchemy.api"
-
- # Path to the extensions
- api_extensions_path = trove/extensions/routes
- guest_config = /etc/trove/conf.d/guest_info
- cloudinit_location = /etc/trove/cloudinit
-
- # Configuration options for talking to nova via the novaclient.
- trove_auth_url = http://0.0.0.0:5000/v2.0
- nova_compute_url = http://127.0.0.1:8774/v2
- cinder_url = http://127.0.0.1:8776/v1
- swift_url = http://127.0.0.1:8080/v1/AUTH_
- heat_url = http://127.0.0.1:8004/v1
-
- use_heat = True
- template_path = /etc/trove/templates/
-
- # Config option for showing the IP address that nova doles out
- default_neutron_networks = 9cbae051-78c7-4574-968e-2cb9b0f410ad
- network_label_regex = ^private$
- #ip_regex = ^(15.|123.)
-
- # Config options for enabling volume service
- trove_volume_support = True
- block_device_mapping = vdb
- device_path = /dev/vdb
- # Maximum volume size for an instance
- max_accepted_volume_size = 10
- max_instances_per_user = 5
- # Maximum volume capacity (in GB) spanning across all trove volumes per tenant
- max_volumes_per_user = 100
- max_backups_per_user = 5
- volume_time_out=30
-
- # Config options for rate limits
- http_get_rate = 200
- http_post_rate = 200
- http_put_rate = 200
- http_delete_rate = 200
-
- # Trove DNS
- trove_dns_support = False
- dns_account_id = 123456
- dns_auth_url = http://127.0.0.1:5000/v2.0
- dns_username = user
- dns_passkey = password
- dns_ttl = 3600
- dns_domain_name = 'trove.com.'
- dns_domain_id = 11111111-1111-1111-1111-111111111111
- dns_driver = trove.dns.designate.driver.DesignateDriver
- dns_instance_entry_factory = trove.dns.designate.driver.DesignateInstanceEntryFactory
- dns_endpoint_url = http://127.0.0.1/v1/
- dns_service_type = dns
-
- # Taskmanager queue name
- taskmanager_queue = taskmanager
-
- # Auth
- admin_roles = admin
-
- # Users to ignore for user create/list/delete operations
- ignore_users = os_admin, root
- ignore_dbs = lost+found, mysql, information_schema
-
- # Guest related conf
- agent_heartbeat_time = 10
- agent_call_low_timeout = 5
- agent_call_high_timeout = 150
-
- # Reboot time out for instances
- reboot_time_out = 60
-
- # Trove api-paste file name
- api_paste_config = /etc/trove/api-paste.ini
-
-
- # ============ notifer queue kombu connection options ========================
-
- notifier_queue_hostname = 127.0.0.1
- notifier_queue_userid = guest
- notifier_queue_password = guest
- notifier_queue_ssl = False
- notifier_queue_port = 5672
- notifier_queue_virtual_host = /
- notifier_queue_transport = memory
-
- control_exchange = trove
-
- # ============ Logging information =============================
- log_dir = /var/log/trove
- log_file = trove-api.log
-
-
- # ============ SSL configuration (and enablement) =============================
- # In order to enable SSL for the trove api server, uncomment
- # the cert_file and key_file - and of course have those files
- # accessible. The existence of those setting and files will
- # enable SSL.
-
- [ssl]
-
- #cert_file = /path/to/server.crt
- #key_file = /path/to/server.key
- #optional:
- #ca_file = /path/to/ca_file
-
- [mysql]
-
- root_on_create = False
-
- # ================= Security groups related ========================
- # Each future datastore implementation should implement
- # its own oslo group with defined in it:
- # - tcp_ports; upd_ports;
-
- [mysql]
- # Format (single port or port range): A, B-C
- # where C greater than B
- tcp_ports = 3306
-
- [redis]
- # Format (single port or port range): A, B-C
- # where C greater than B
- tcp_ports = 6379
-
- [cassandra]
- tcp_ports = 7000, 7001, 9042, 9160
-
- [couchbase]
- tcp_ports = 8091, 8092, 4369, 11209-11211, 21100-21199
trove-conductor 配置
/etc/trove/trove-conductor.conf 内容如下:
- [DEFAULT]
- verbose = True
- debug = True
- control_exchange = trove
- trove_auth_url = http://127.0.0.1:5000/v2.0
- sql_connection = mysql://trove:trove@localhost/trove?charset=utf8
- rabbit_host = 127.0.0.1
- rabbit_password = guest
trove-taskmanager 配置
/etc/trove/trove-taskmanager.conf 内容如下:
- [DEFAULT]
- # Show more verbose log output (sets INFO log level output)
- verbose = True
-
- # Show debugging output in logs (sets DEBUG log level output)
- debug = True
-
- # Updates service and instance task statuses if instance failed become active
- update_status_on_fail = False
-
- # AMQP Connection info
- rabbit_host=127.0.0.1
- rabbit_password=guest
-
- # SQLAlchemy connection string for the reference implementation
- # registry server. Any valid SQLAlchemy connection string is fine.
- # See: http://www.sqlalchemy.org/docs/05/reference/sqlalchemy/connections.html#sqlalchemy.create_engine
- sql_connection = mysql://trove:trove@localhost/trove?charset=utf8
- # sql_connection = mysql://root:root@localhost/trove
-
- # Period in seconds after which SQLAlchemy should reestablish its connection
- # to the database.
- #
- # MySQL uses a default `wait_timeout` of 8 hours, after which it will drop
- # idle connections. This can result in 'MySQL Gone Away' exceptions. If you
- # notice this, you can lower this value to ensure that SQLAlchemy reconnects
- # before MySQL can drop the connection.
- sql_idle_timeout = 3600
-
- #DB Api Implementation
- db_api_implementation = trove.db.sqlalchemy.api
-
- # Configuration options for talking to nova via the novaclient.
- trove_auth_url = http://0.0.0.0:5000/v2.0
- nova_compute_url = http://127.0.0.1:8774/v2
- cinder_url = http://127.0.0.1:8776/v1
- swift_url = http://127.0.0.1:8080/v1/AUTH_
- heat_url = http://127.0.0.1:8004/v1
- use_heat = True
-
-
- # Config options for enabling volume service
- trove_volume_support = True
- block_device_mapping = vdb
- device_path = /dev/vdb
- mount_point = /var/lib/mysql
- volume_time_out=30
- server_delete_time_out=480
-
- # Configuration options for talking to nova via the novaclient.
- # These options are for an admin user in your keystone config.
- # It proxy's the token received from the user to send to nova via this admin users creds,
- # basically acting like the client via that proxy token.
- nova_proxy_admin_user = admin
- nova_proxy_admin_pass = password
- nova_proxy_admin_tenant_name = admin
-
- # Manager impl for the taskmanager
- taskmanager_manager=trove.taskmanager.manager.Manager
-
- # Manager sends Exists Notifications
- exists_notification_transformer = trove.extensions.mgmt.instances.models.NovaNotificationTransformer
- exists_notification_ticks = 30
- #notification_service_id = mysql:2f3ff068-2bfb-4f70-9a9d-a6bb65bc084b
-
- # Trove DNS
- trove_dns_support = False
- dns_account_id = 123456
- dns_auth_url = http://127.0.0.1:5000/v2.0
- dns_username = user
- dns_passkey = password
- dns_ttl = 3600
- dns_domain_name = 'trove.com.'
- dns_domain_id = 11111111-1111-1111-1111-111111111111
- dns_driver = trove.dns.designate.driver.DesignateDriver
- dns_instance_entry_factory = trove.dns.designate.driver.DesignateInstanceEntryFactory
- dns_endpoint_url = http://127.0.0.1/v1/
- dns_service_type = dns
-
- # Trove Security Groups for Instances
- trove_security_groups_support = True
- trove_security_group_rule_cidr = 0.0.0.0/0
-
- # Guest related conf
- agent_heartbeat_time = 10
- agent_call_low_timeout = 5
- agent_call_high_timeout = 150
-
- # Whether to use nova's contrib api for create server with volume
- use_nova_server_volume = False
-
- # Config option for filtering the IP address that DNS uses
- network_label_regex = ^private$
- #ip_regex = ^(15.|123.)
-
- # Datastore templates
- template_path = /etc/trove/templates/
-
- # ============ notifer queue kombu connection options ========================
-
- notifier_queue_hostname = 127.0.0.1
- notifier_queue_userid = guest
- notifier_queue_password = guest
- notifier_queue_ssl = False
- notifier_queue_port = 5672
- notifier_queue_virtual_host = /
- notifier_queue_transport = memory
-
- # usage notifications
- notification_driver=trove.openstack.common.notifier.rpc_notifier
- control_exchange=trove
-
- # ============ Logging information =============================
- log_dir = /var/log/trove
- log_file = trove-taskmanager.log
-
- # ============ PyDev remote dubugging =============================
-
- # Enable or disable pydev remote debugging.
- # There are three values allowed: 'disabled', 'enabled' and 'auto'
- # If value is 'auto' tries to connect to remote debugger server,
- # but in case of error continue running with disabled debugging
- pydev_debug = disabled
-
- # remote debug server host and port options
- #pydev_debug_host = localhost
- #pydev_debug_port = 5678
-
- # path to pydevd library. It will be used if pydevd is absent in sys.path
- #pydev_path = <path>
-
- # ================= Guestagent related ========================
- #guest_config = $pybasedir/etc/trove/trove-guestagent.conf.sample
- #cloudinit_location = /etc/trove/cloudinit
-
- # ================= Security groups related ========================
- # Each future datastore implementation should implement
- # its own oslo group with defined in it:
- # - tcp_ports; upd_ports;
-
- [mysql]
- # Format (single port or port range): A, B-C
- # where C greater than B
- tcp_ports = 3306
-
- [redis]
- # Format (single port or port range): A, B-C
- # where C greater than B
- tcp_ports = 6379
-
- [cassandra]
- tcp_ports = 7000, 7001, 9042, 9160
-
- [couchbase]
- tcp_ports = 8091, 8092, 4369, 11209-11211, 21100-21199
同步数据库 - trove-manage --config-file=/etc/trove/trove.conf db_sync
制作系统服务 把 trove 三个服务做成系统服务,方便点。
/etc/init/trove-api.conf:
- description "Trove API Server"
- author "Longgeek <longgeek@gmail.com>"
- start on (local-filesystems and net-device-up IFACE!=lo)
- stop on runlevel [016]
- respawn
-
- exec su -s /bin/sh -c "exec trove-api --config-file=/etc/trove/trove.conf" root
/etc/init/trove-conductor.conf:
- description "Trove Conductor Server"
- author "Longgeek <longgeek@gmail.com>"
- start on (local-filesystems and net-device-up IFACE!=lo)
- stop on runlevel [016]
- respawn
-
- exec su -s /bin/sh -c "exec trove-conductor --config-file=/etc/trove/trove-conductor.conf --log-file /var/log/trove/trove-conductor.log" root
/etc/init/trove-taskmanager.conf:
- description "Trove TaskManager Server"
- author "Longgeek <longgeek@gmail.com>"
- start on (local-filesystems and net-device-up IFACE!=lo)
- stop on runlevel [016]
- respawn
-
- exec su -s /bin/sh -c "exec trove-taskmanager --config-file=/etc/trove/trove-taskmanager.conf --log-file /var/log/trove/trove-taskmanager.log" root
upstart 脚本链接:
- ln -s /lib/init/upstart-job /etc/init.d/trove-api
- ln -s /lib/init/upstart-job /etc/init.d/trove-conductor
- ln -s /lib/init/upstart-job /etc/init.d/trove-taskmanager
加入到开启启动:
- update-rc.d trove-api defaults
- update-rc.d trove-conductor defaults
- update-rc.d trove-taskmanager defaults
启动服务- for serv in api conductor taskmanager; do /etc/init.d/trove-$serv restart; done
自定义 heat 模版上面在配置文件中指定了 heat 模版的路径,如下:
- template_path = /etc/trove/templates/
需要拷贝源代码目录中的 templates 所有 heat 模版到 trove 目录中:
- cp -r /opt/trove/trove/templates /etc/trove/
自定义 heat 模版,这时候你需要读些trove 镜像文章,应该会明白为什么要自定义 heat 模版:http://longgeek.com/2014/05/19/openstack-trove-dedicated-mirror-making
修改 heat 模版,在模版中可以看到 sudo service trove-guest start 这个 trove-guest 服务,它其实是一个 cli,只存在与 trove-integration 项目中,所以需要改为 trove-guestagent,同样可以添加多条命令,下面的 see 我用来替换了配置文件中 change_me 这个关键字为我的服务具体的 IP 地址,同样可以使用类似方法修改 rabbit_passwd、nova 密码之类的:
- vim /etc/trove/templates/mysql/heat.template
-
- 56 UserData:
- 57 Fn::Base64:
- 58 Fn::Join:
- 59 - ''
- 60 - ["#!/bin/bash -v\n",
- 61 "/opt/aws/bin/cfn-init\n",
- 62 "sudo sed -i 's/change_me/192.168.8.242/g' /etc/trove/trove-guestagent.conf\n",
- 63 "sudo /etc/init.d/trove-guestagent restart\n"]
定义 Trovetrove 用来启动不同数据库,需要事先定义不同类型数据库,在 trove 里叫 datastore。
下面是定义一个 mysql type的过程,前提做好了 trove 的镜像,且已上传:
创建 datastore type:
- trove-manage datastore_update mysql ''
查看 datastore:
- trove datastore-list
- +-------------------------------------------------------+-------------------+
- | id | name |
- +-------------------------------------------------------+-------------------+
- | 10000000-0000-0000-0000-000000000001 | Legacy MySQL |
- | ea341501-c134-4a62-ab4f-47813a74d190 | mysql |
- +-------------------------------------------------------+-------------------+
给 datastore 指定专属镜像、mysql 具体的版本,同时启用这个 datastore:
- glance image-list | grep 'Ubuntu-12.04.4-Server-Trove-Mysql-5.5' | awk '{print $2}'
- bb23f309-64d6-40ae-8d19-4d8404aabc39
-
- trove-manage --config-file=/etc/trove/trove.conf \
- datastore_version_update \
- mysql 5.5 mysql \
- bb23f309-64d6-40ae-8d19-4d8404aabc39 \
- mysql-server-5.5 1
指定默认的版本:
- trove-manage --config-file=/etc/trove/trove.conf datastore_update mysql 5.5
查看 datastore 信息:
- trove datastore-show mysql
- +-------------------+------------------------------------------------------+
- | Property | Value |
- +-------------------+------------------------------------------------------+
- | default_version | 8bacae40-c1ab-4444-9720-6d574901dbb5 |
- | id | ea341501-c134-4a62-ab4f-47813a74d190 |
- | name | mysql |
- +-------------------+------------------------------------------------------+
查看 datastore 有哪些版本:
- trove datastore-version-list mysql
- +------------------------------------------------------+-------+
- | id | name |
- +------------------------------------------------------+-------+
- | 8bacae40-c1ab-4444-9720-6d574901dbb5 | 5.5 |
- +------------------------------------------------------+-------+
查看 datastore 某个版本的详细信息:
- trove datastore-version-show 8bacae40-c1ab-4444-9720-6d574901dbb5
- +-----------+-------------------------------------------------------+
- | Property | Value |
- +------------+------------------------------------------------------+
- | active | True |
- | datastore | ea341501-c134-4a62-ab4f-47813a74d190 |
- | id | 8bacae40-c1ab-4444-9720-6d574901dbb5 |
- | image | cc3a7b02-5346-4d9f-8b94-7519c7429eee |
- | name | 5.5 |
- | packages | mysql-server-5.5 |
- +------------+-------------------------------------------------------+
命令行方式创建 trove 实例先看看 trove create 需要哪些参数:
- trove create
- usage: trove create <name> <flavor_id>
- [--size <size>]
- [--databases <databases> [<databases> ...]]
- [--users <users> [<users> ...]] [--backup <backup>]
- [--availability_zone <availability_zone>]
- [--datastore <datastore>]
- [--datastore_version <datastore_version>]
- [--nic <net-id=net-uuid,v4-fixed-ip=ip-addr,port-id=port-uuid>]
- [--configuration <configuration>]
- error: too few arguments
- Try 'trove help create' for more information.
一次性创建三个数据库: trovedba、trovedbb、trovedbc,并设置数据库用户和密码:
- trove create TROVE_INSTANCE_NAME 2 --size 2 \
- --databases trovedba trovedbb trovedbc \
- --users longgeek:password \
- --datastore_version 5.5 \
- --datastore mysql \
- --nic net-id=9cbae051-78c7-4574-968e-2cb9b0f410ad
查看 trove instance 信息:
- trove list
- trove show INSTANCE_ID
- trove user-list INSTANCE_ID
- trove database-list INSTANCE_ID
界面创建方式 trove 实例界面创建有一些缺陷,不能去指定 instance 所使用的网络、要创建数据库的类型,当然 horizon 的进度在 trove API 之后,估计 juno rc1、rc2 差不多就可以出来。现在的情况是界面上创建的 instance 后使用配置文件中指定的网络 id,用户没有办法去选择,同时创建的数据库类型也是在配置文件指定了默认的类型 default_datastore = mysql:
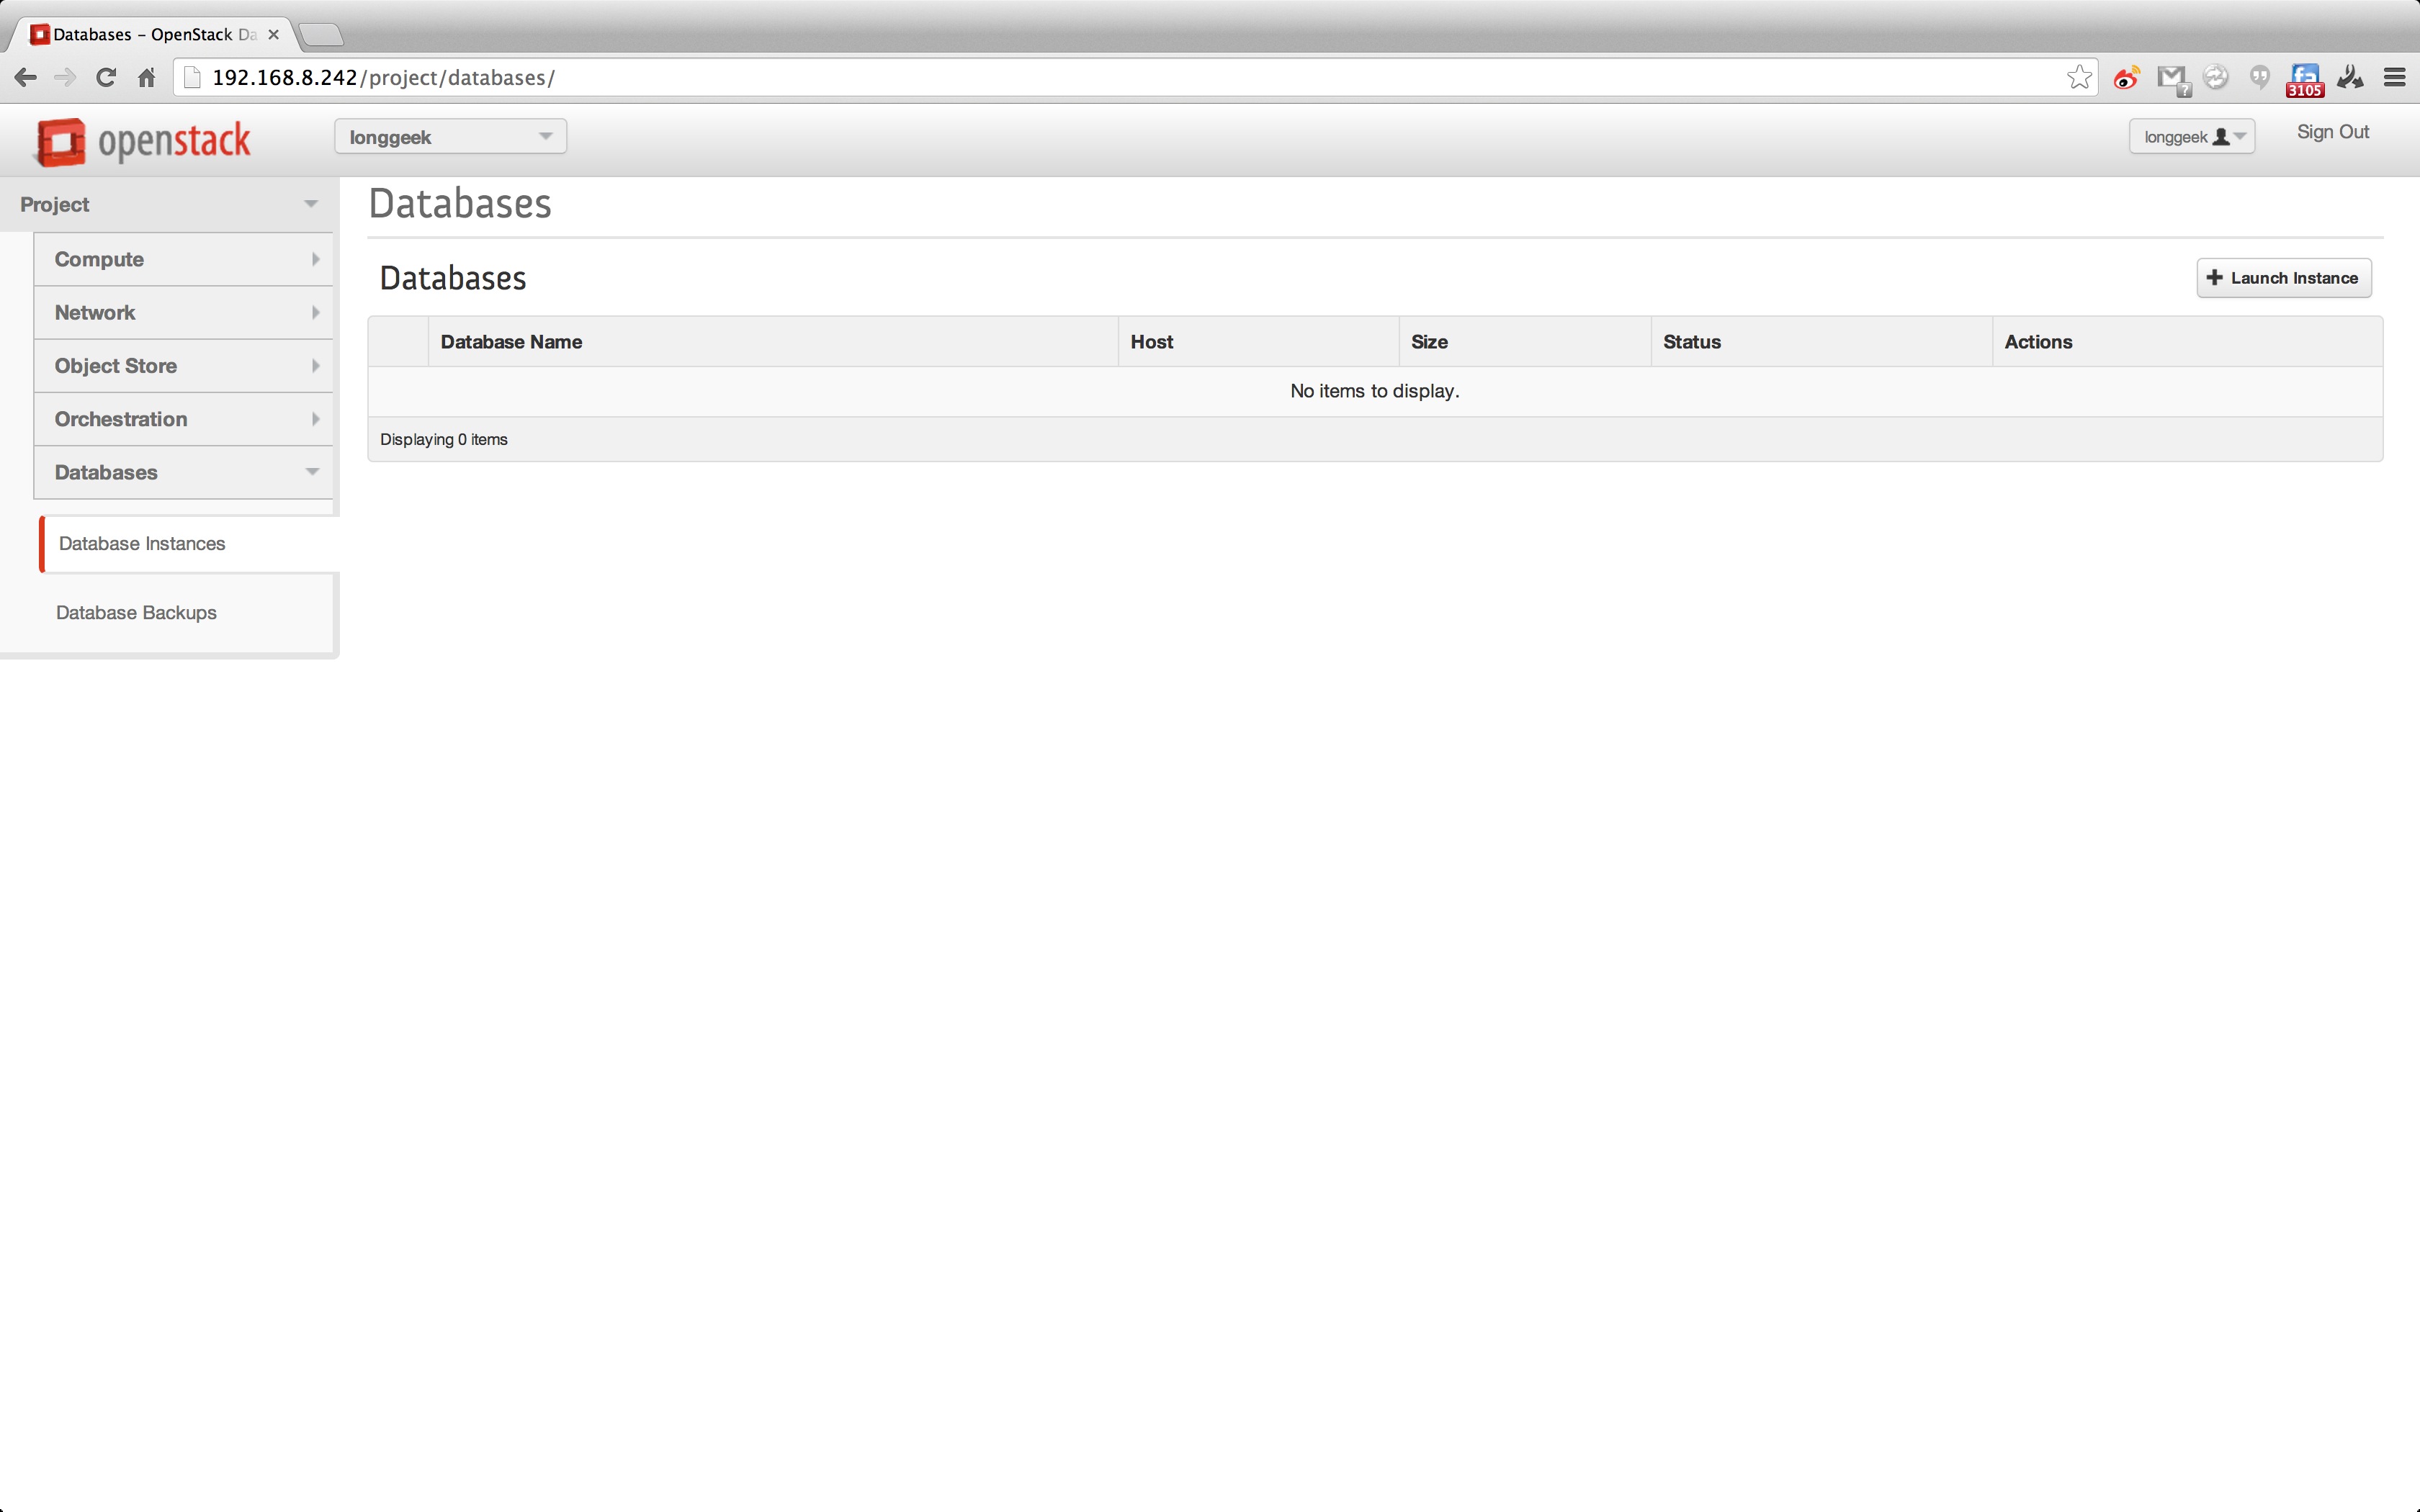
先上图看看 Trove 界面:
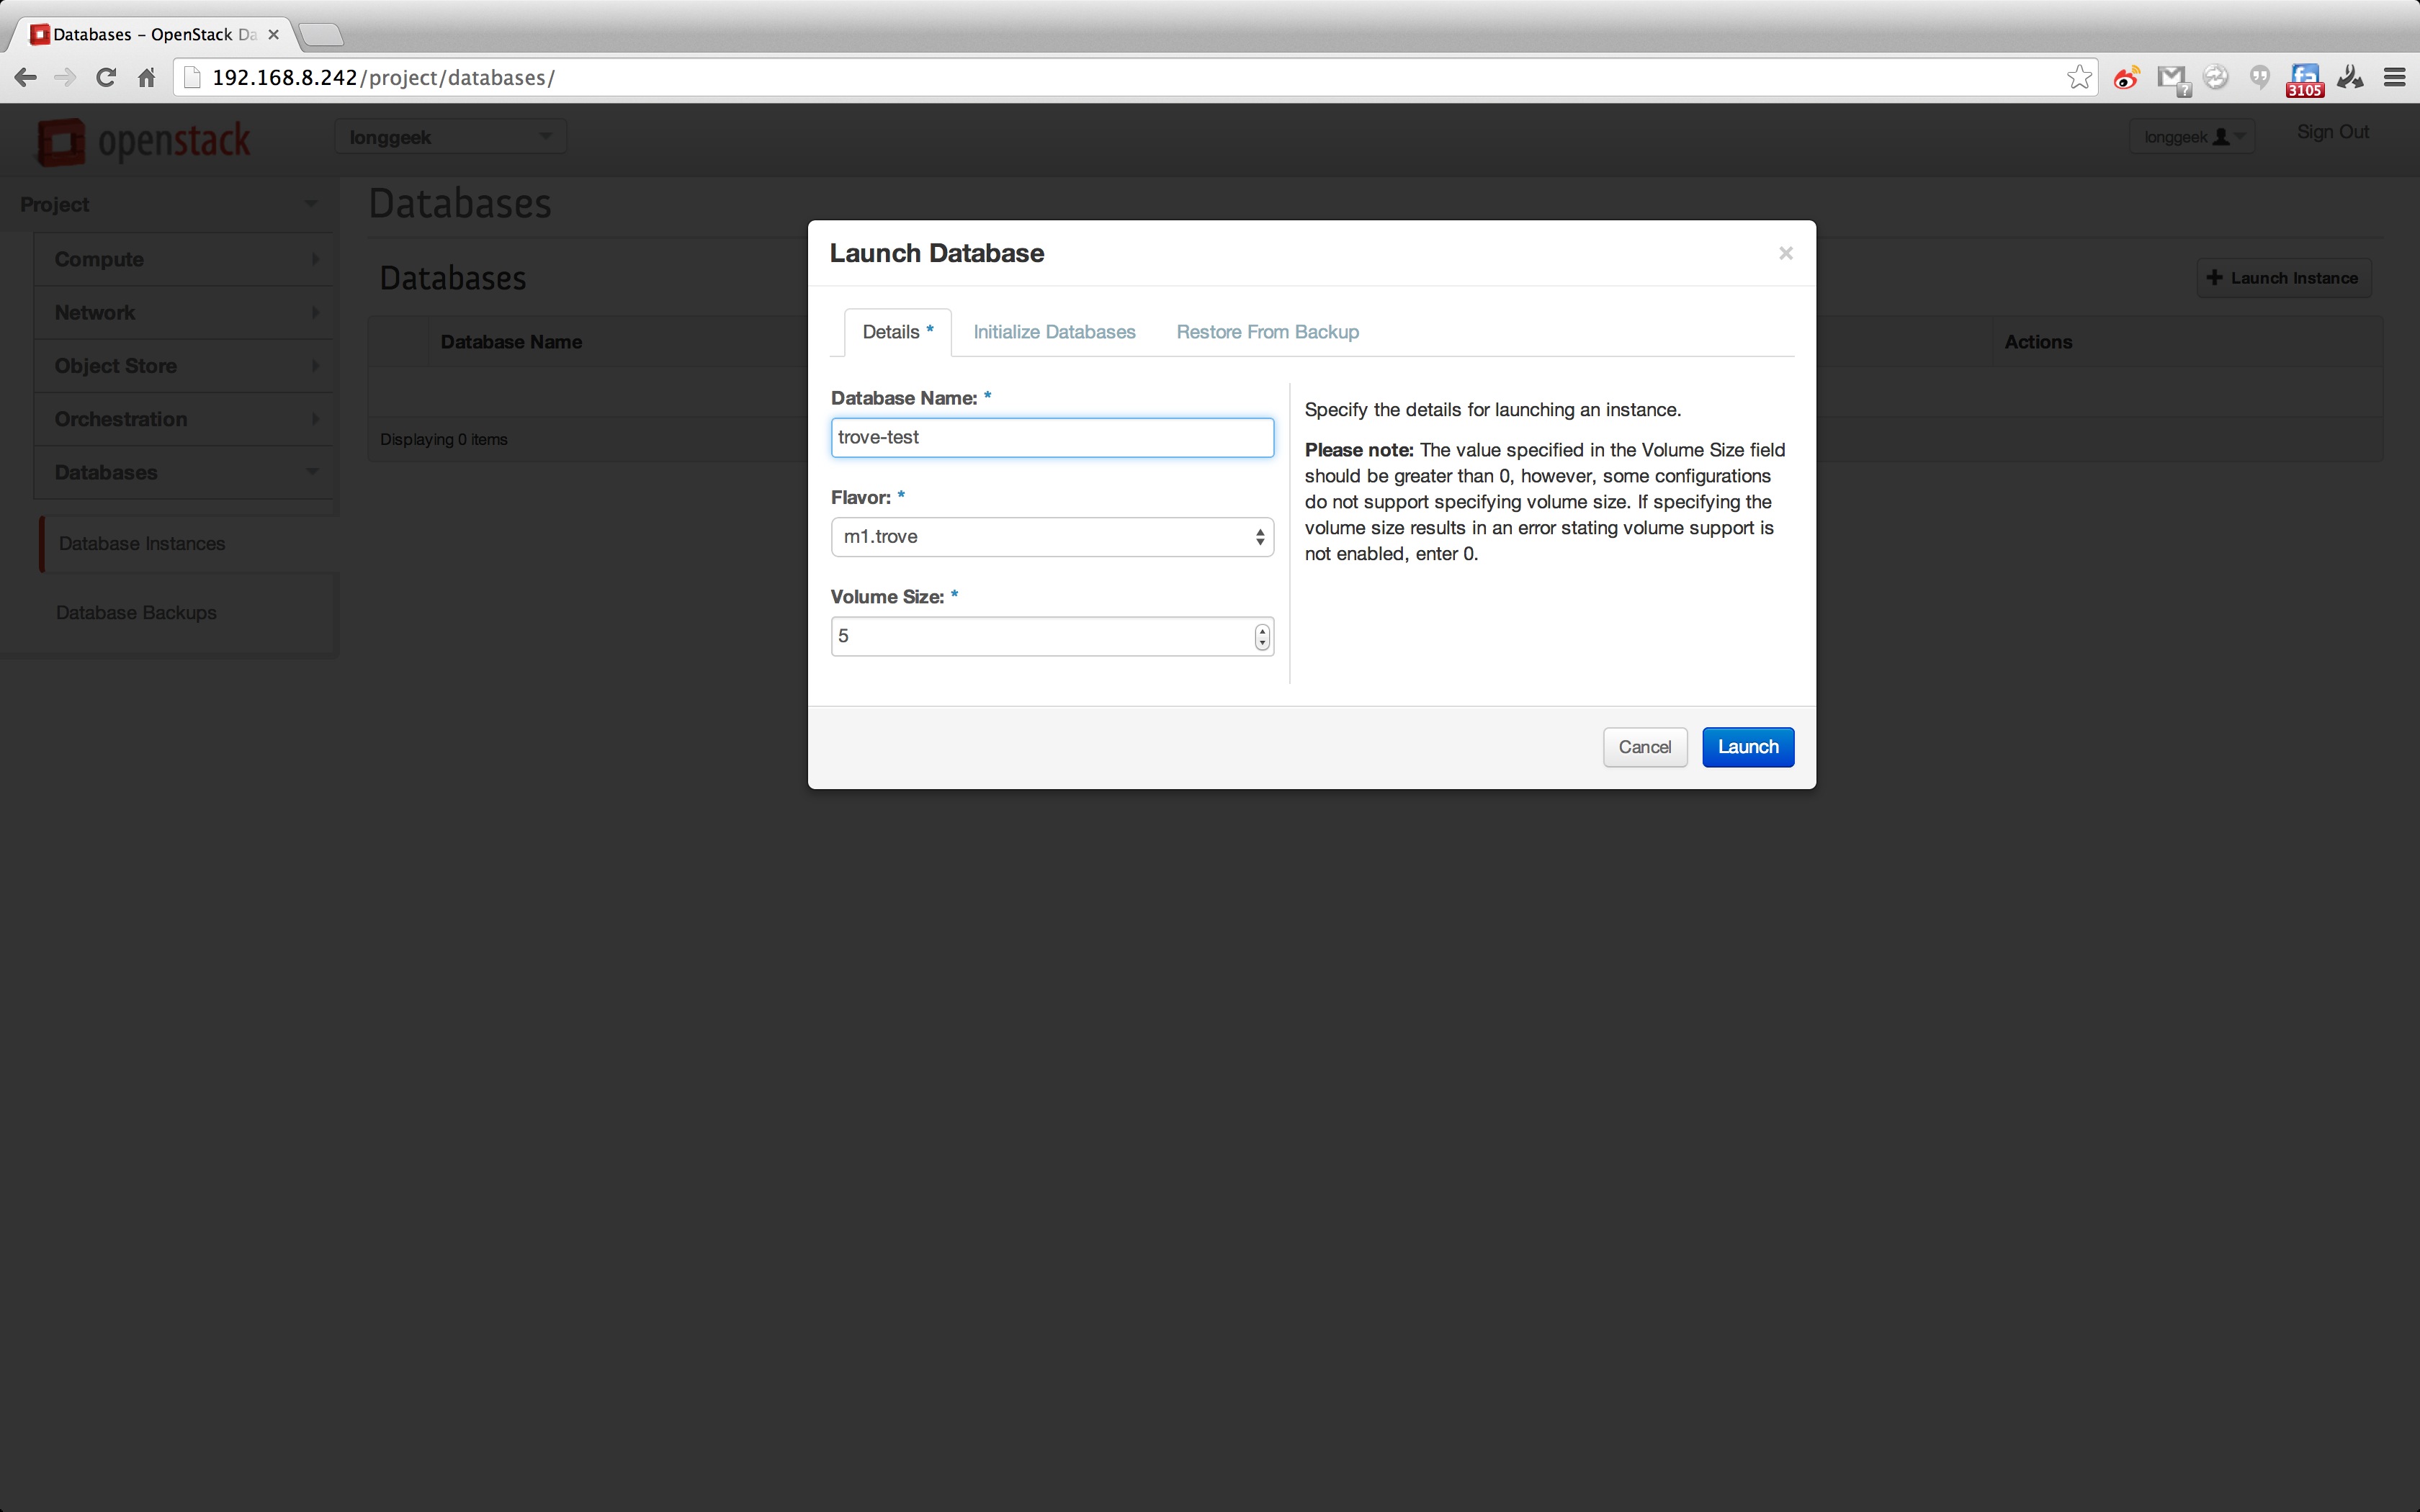
创建一个 trove instance,输入 instance 名字,选择一个 flavor,以及使用的 cinder volume 大小:
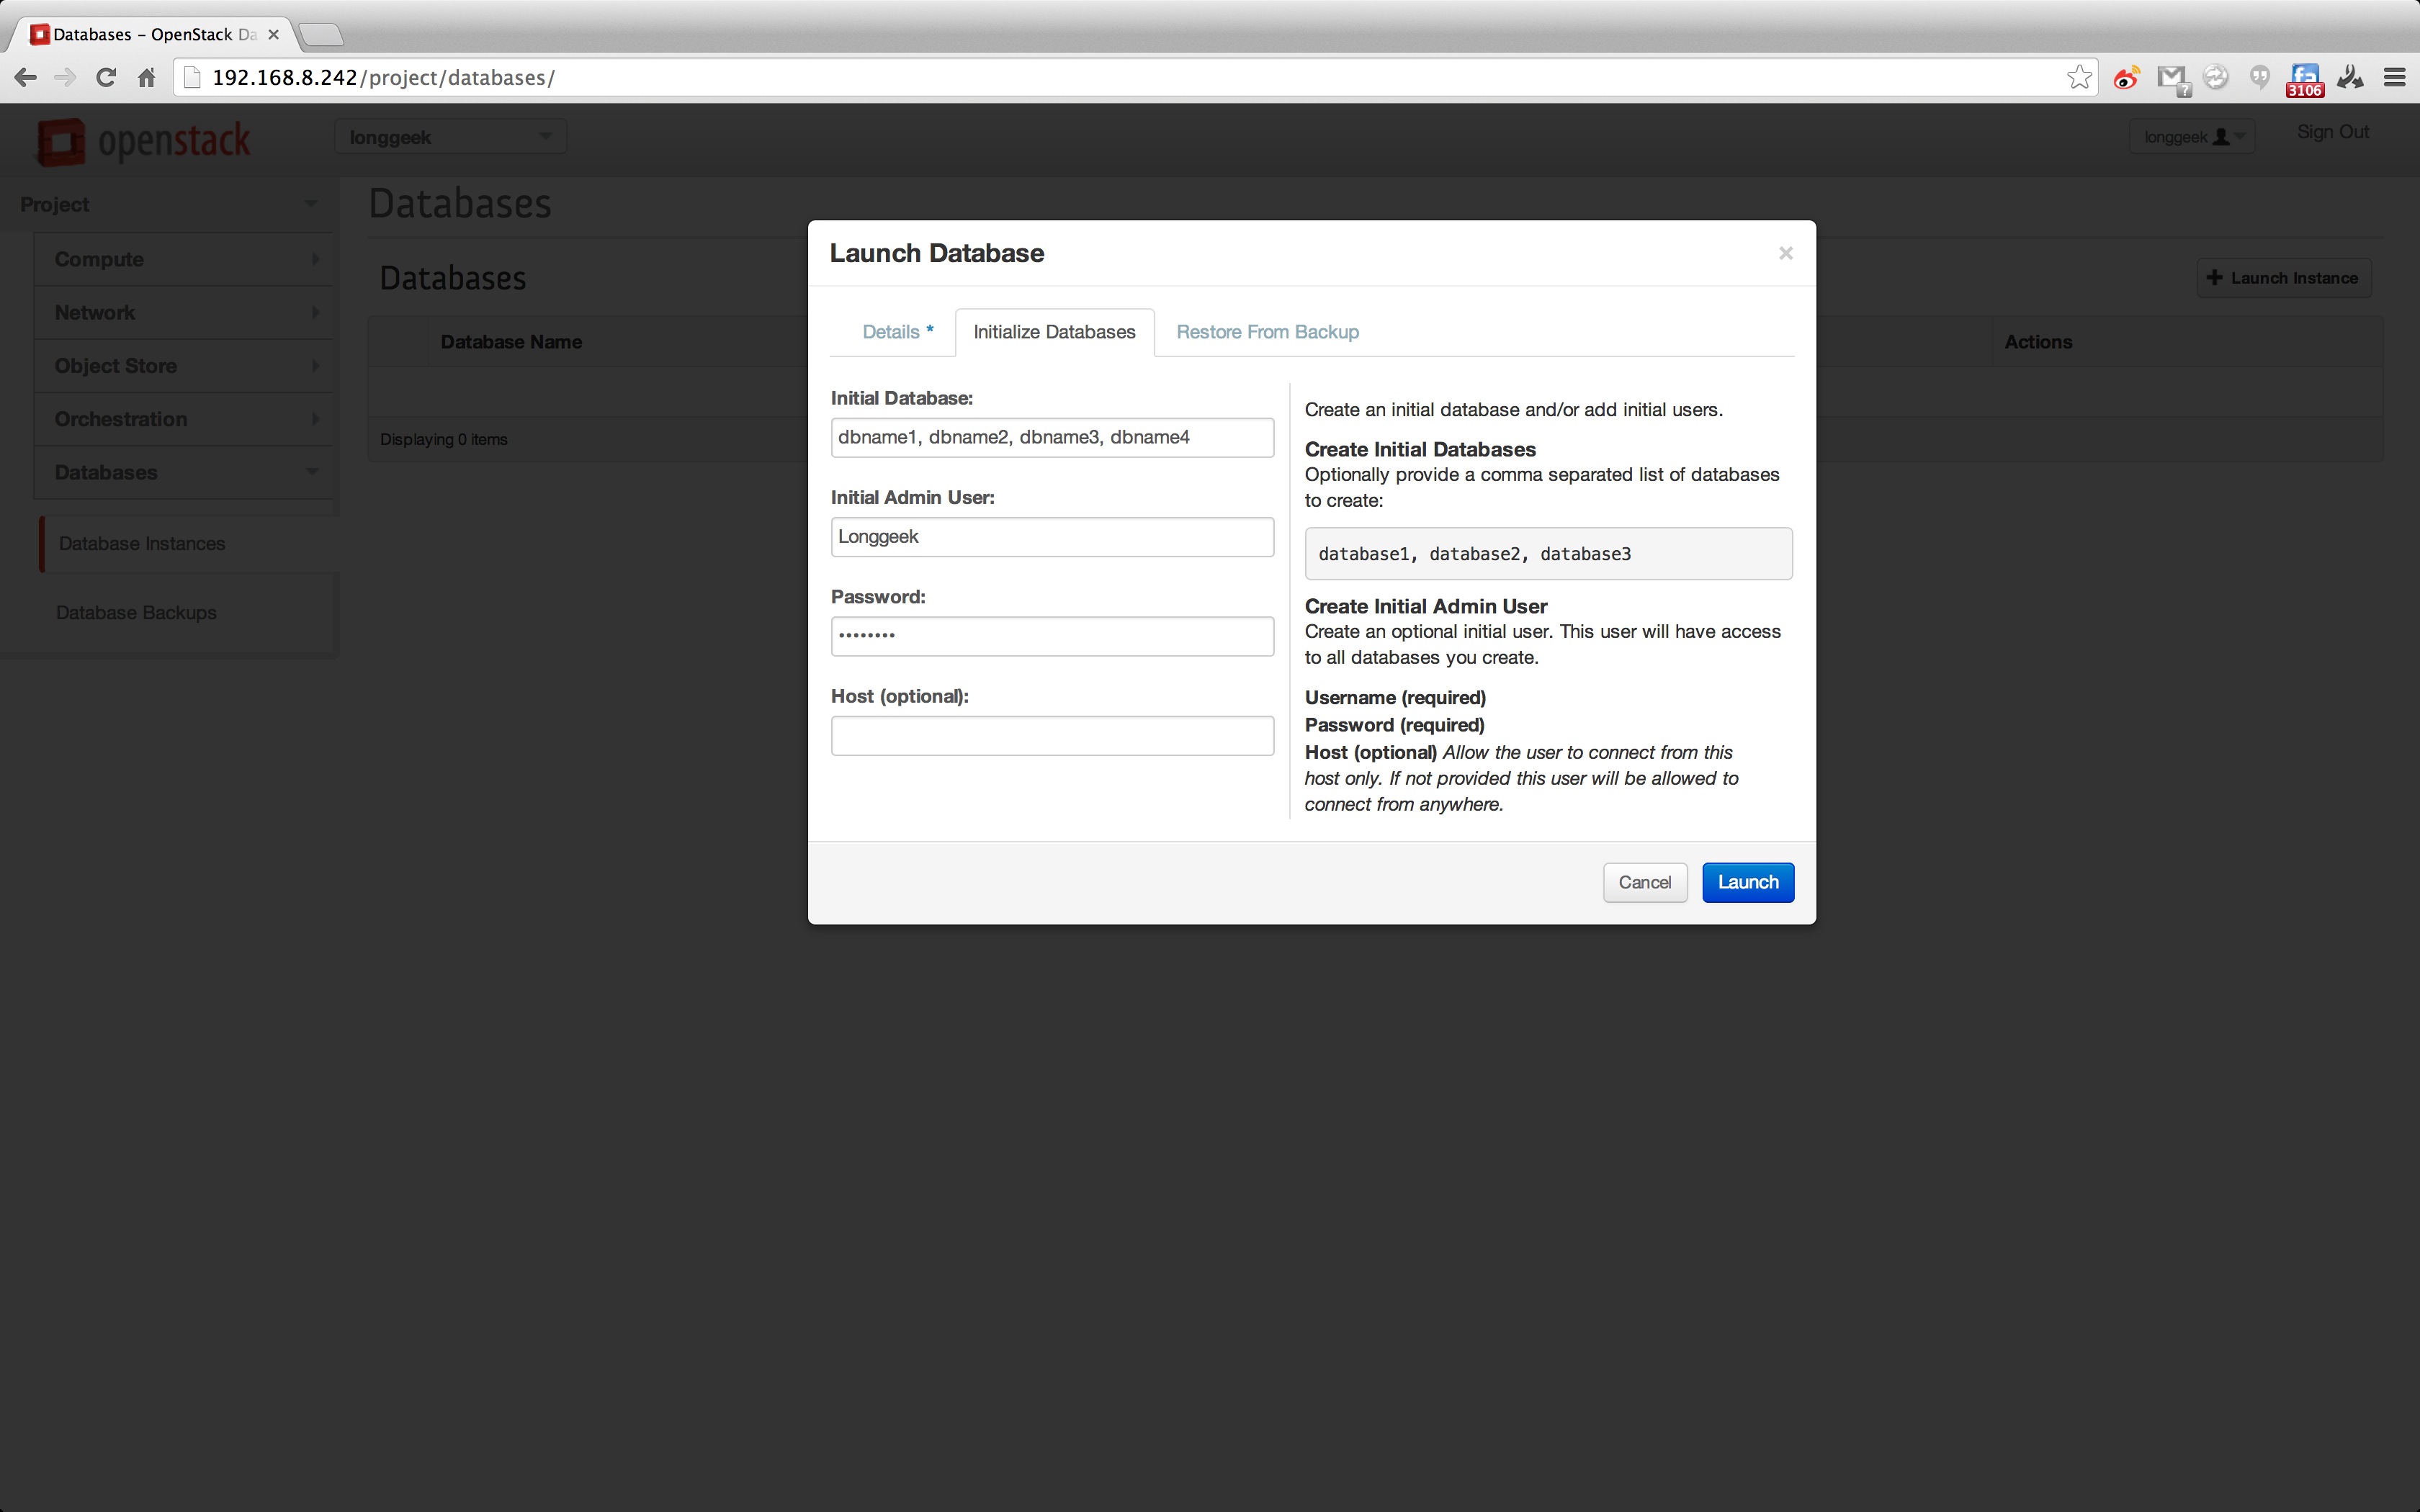
填入要创建的数据库名字、用户名、密码,以及访问限制:
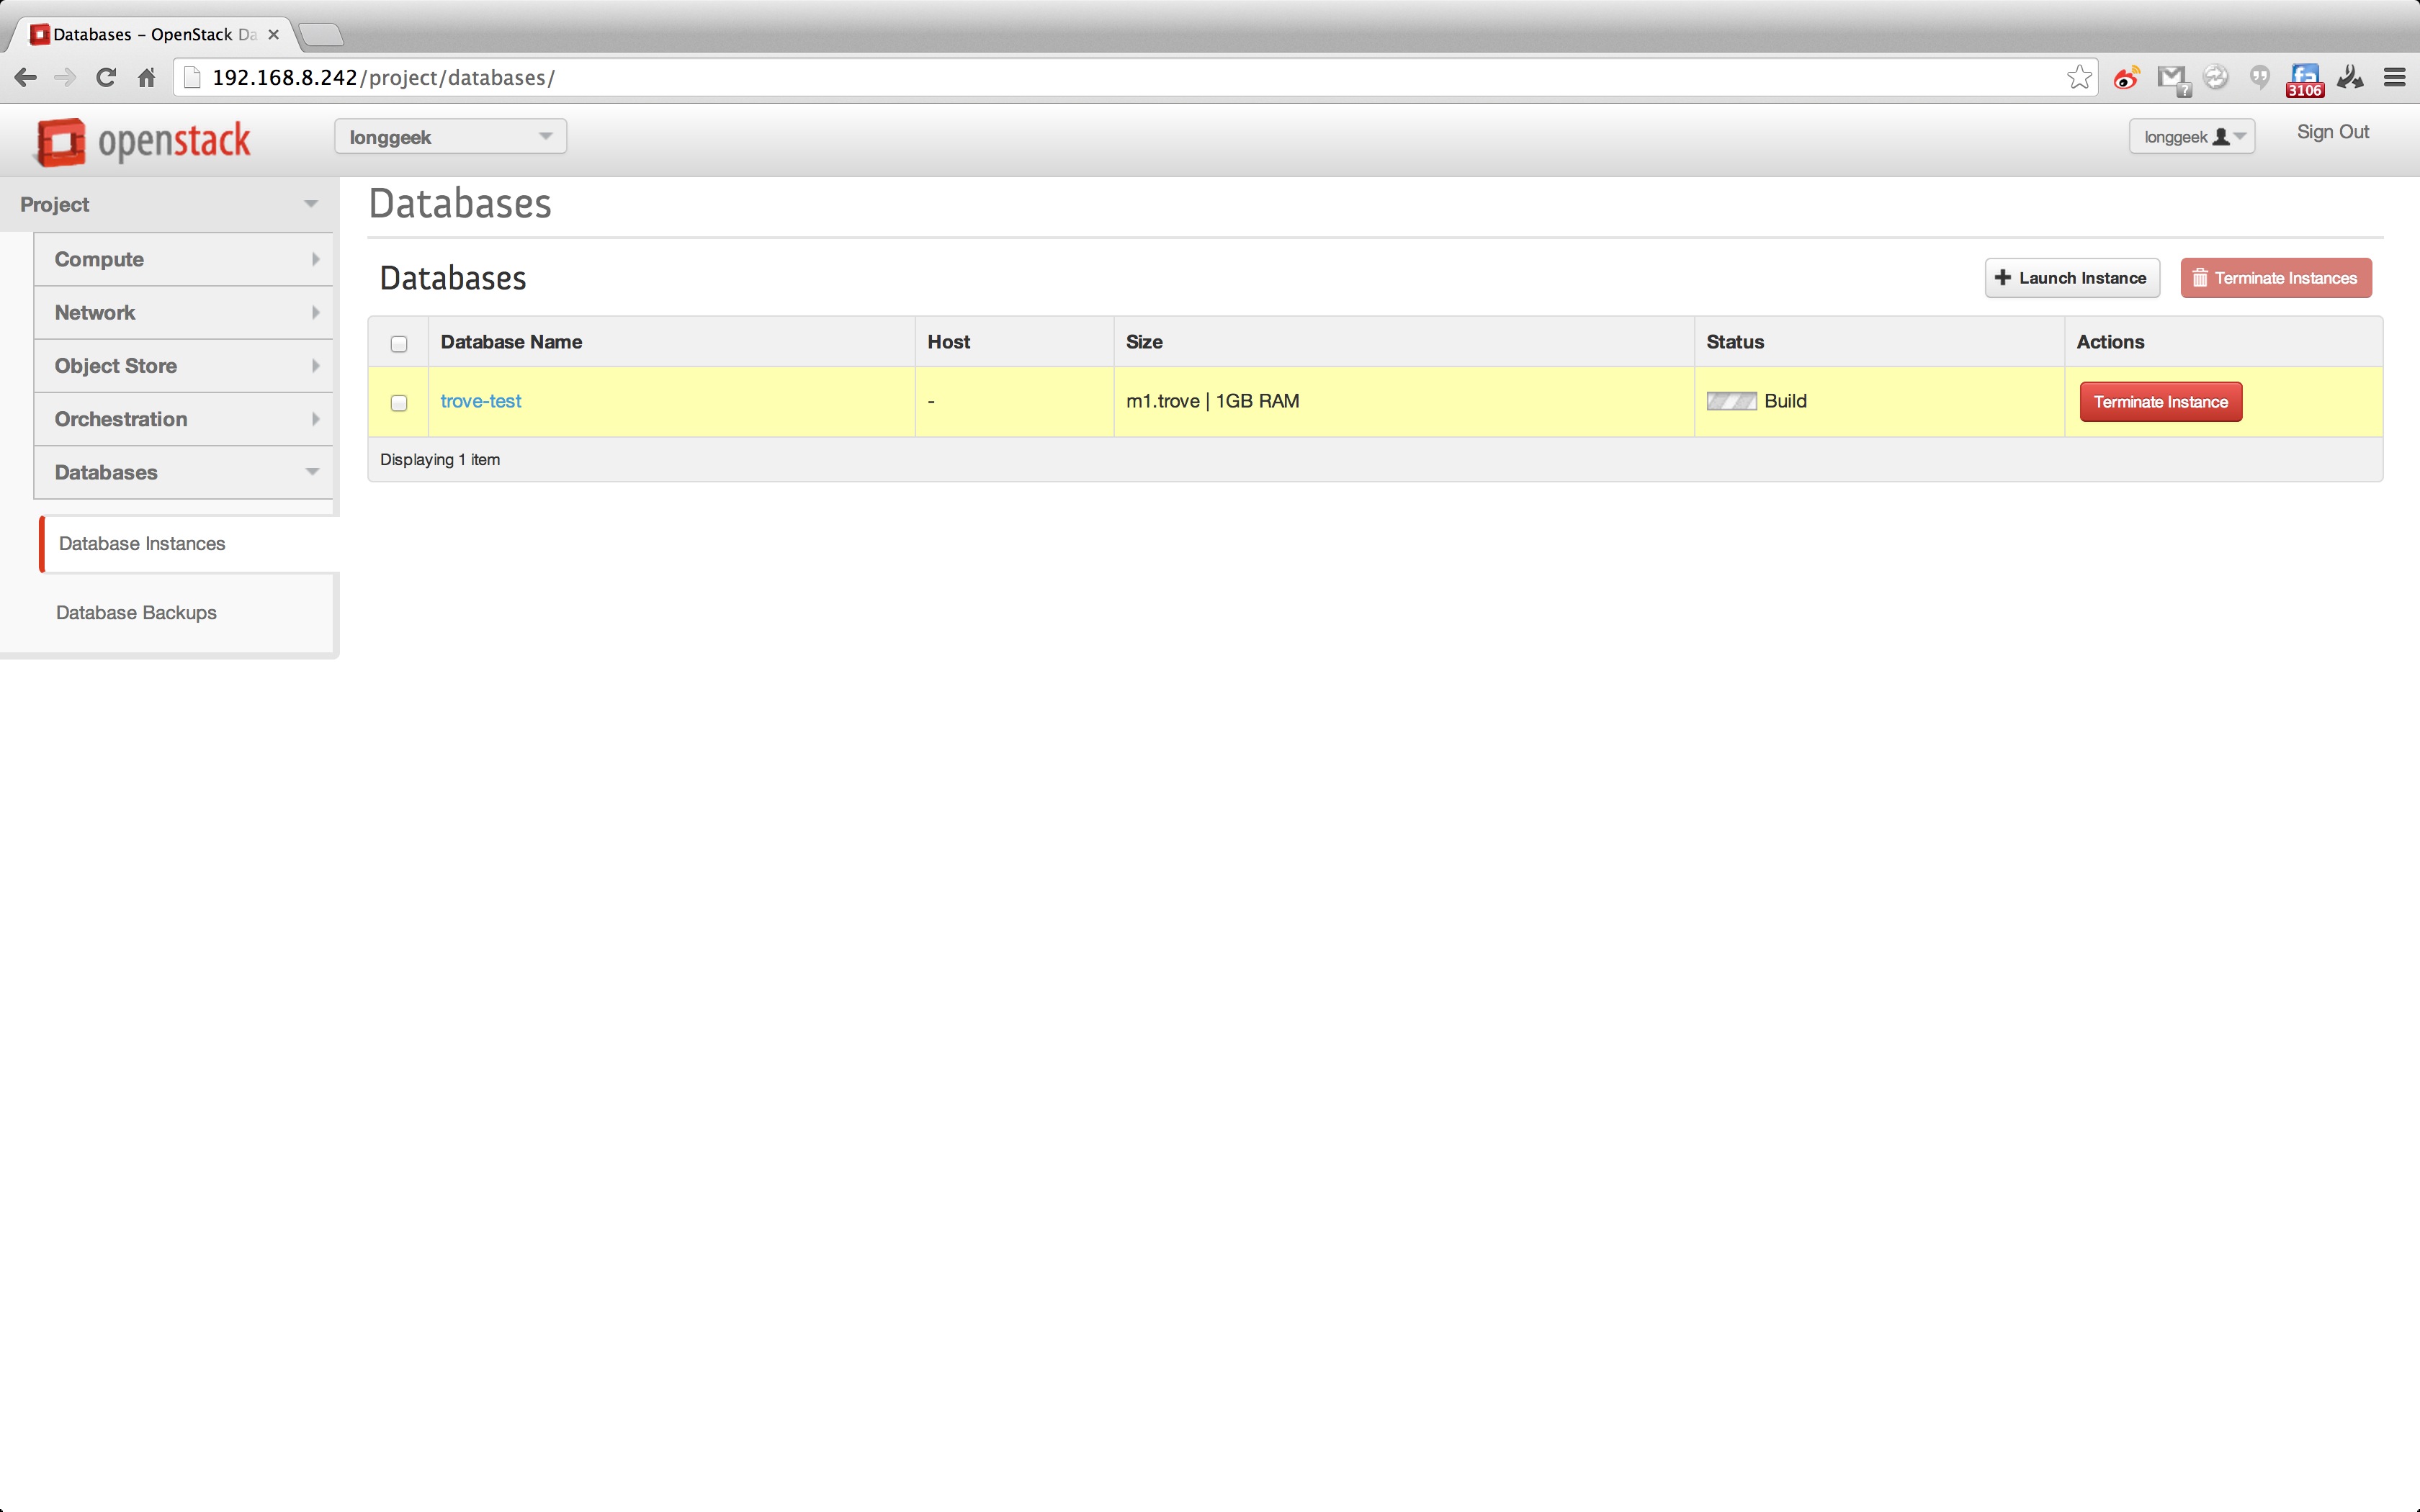
创建完成了,状态显示正在 Build…:
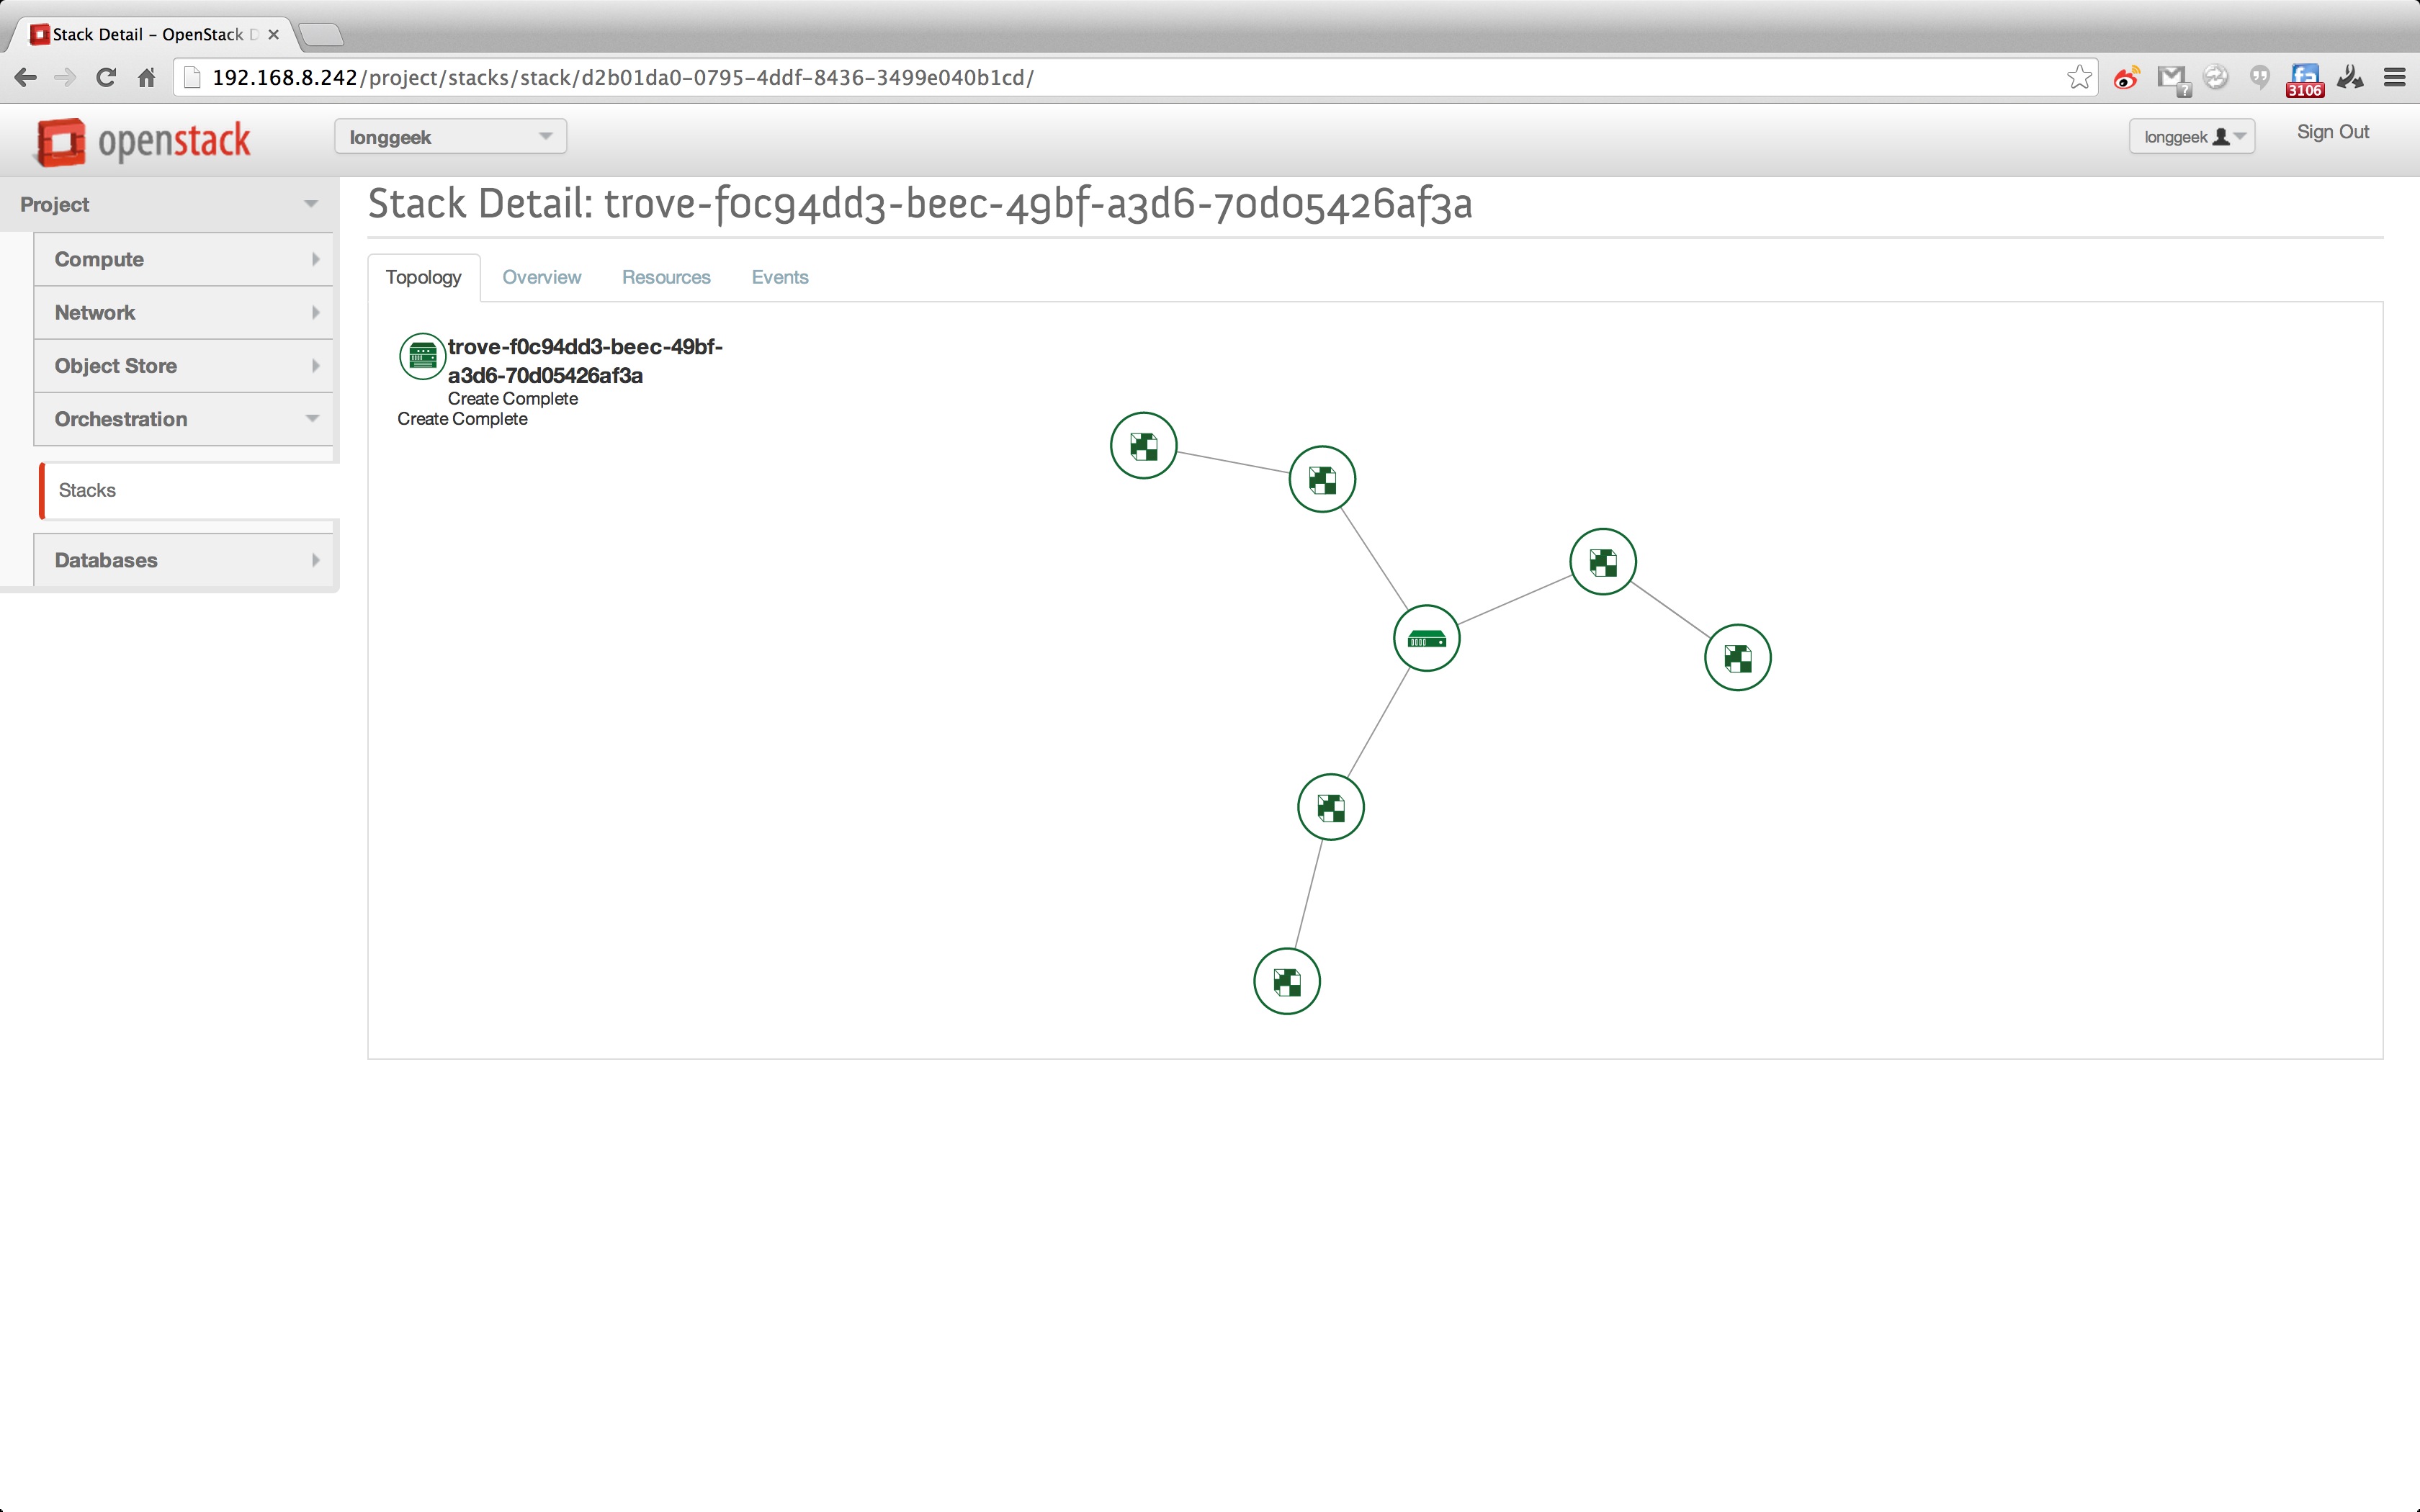
那就看看它调用其它组件都做了什么,Heat 界面上自动生成了一个 stack,定义了 zone、volume、neutron、SecurityGroup、instance 等:
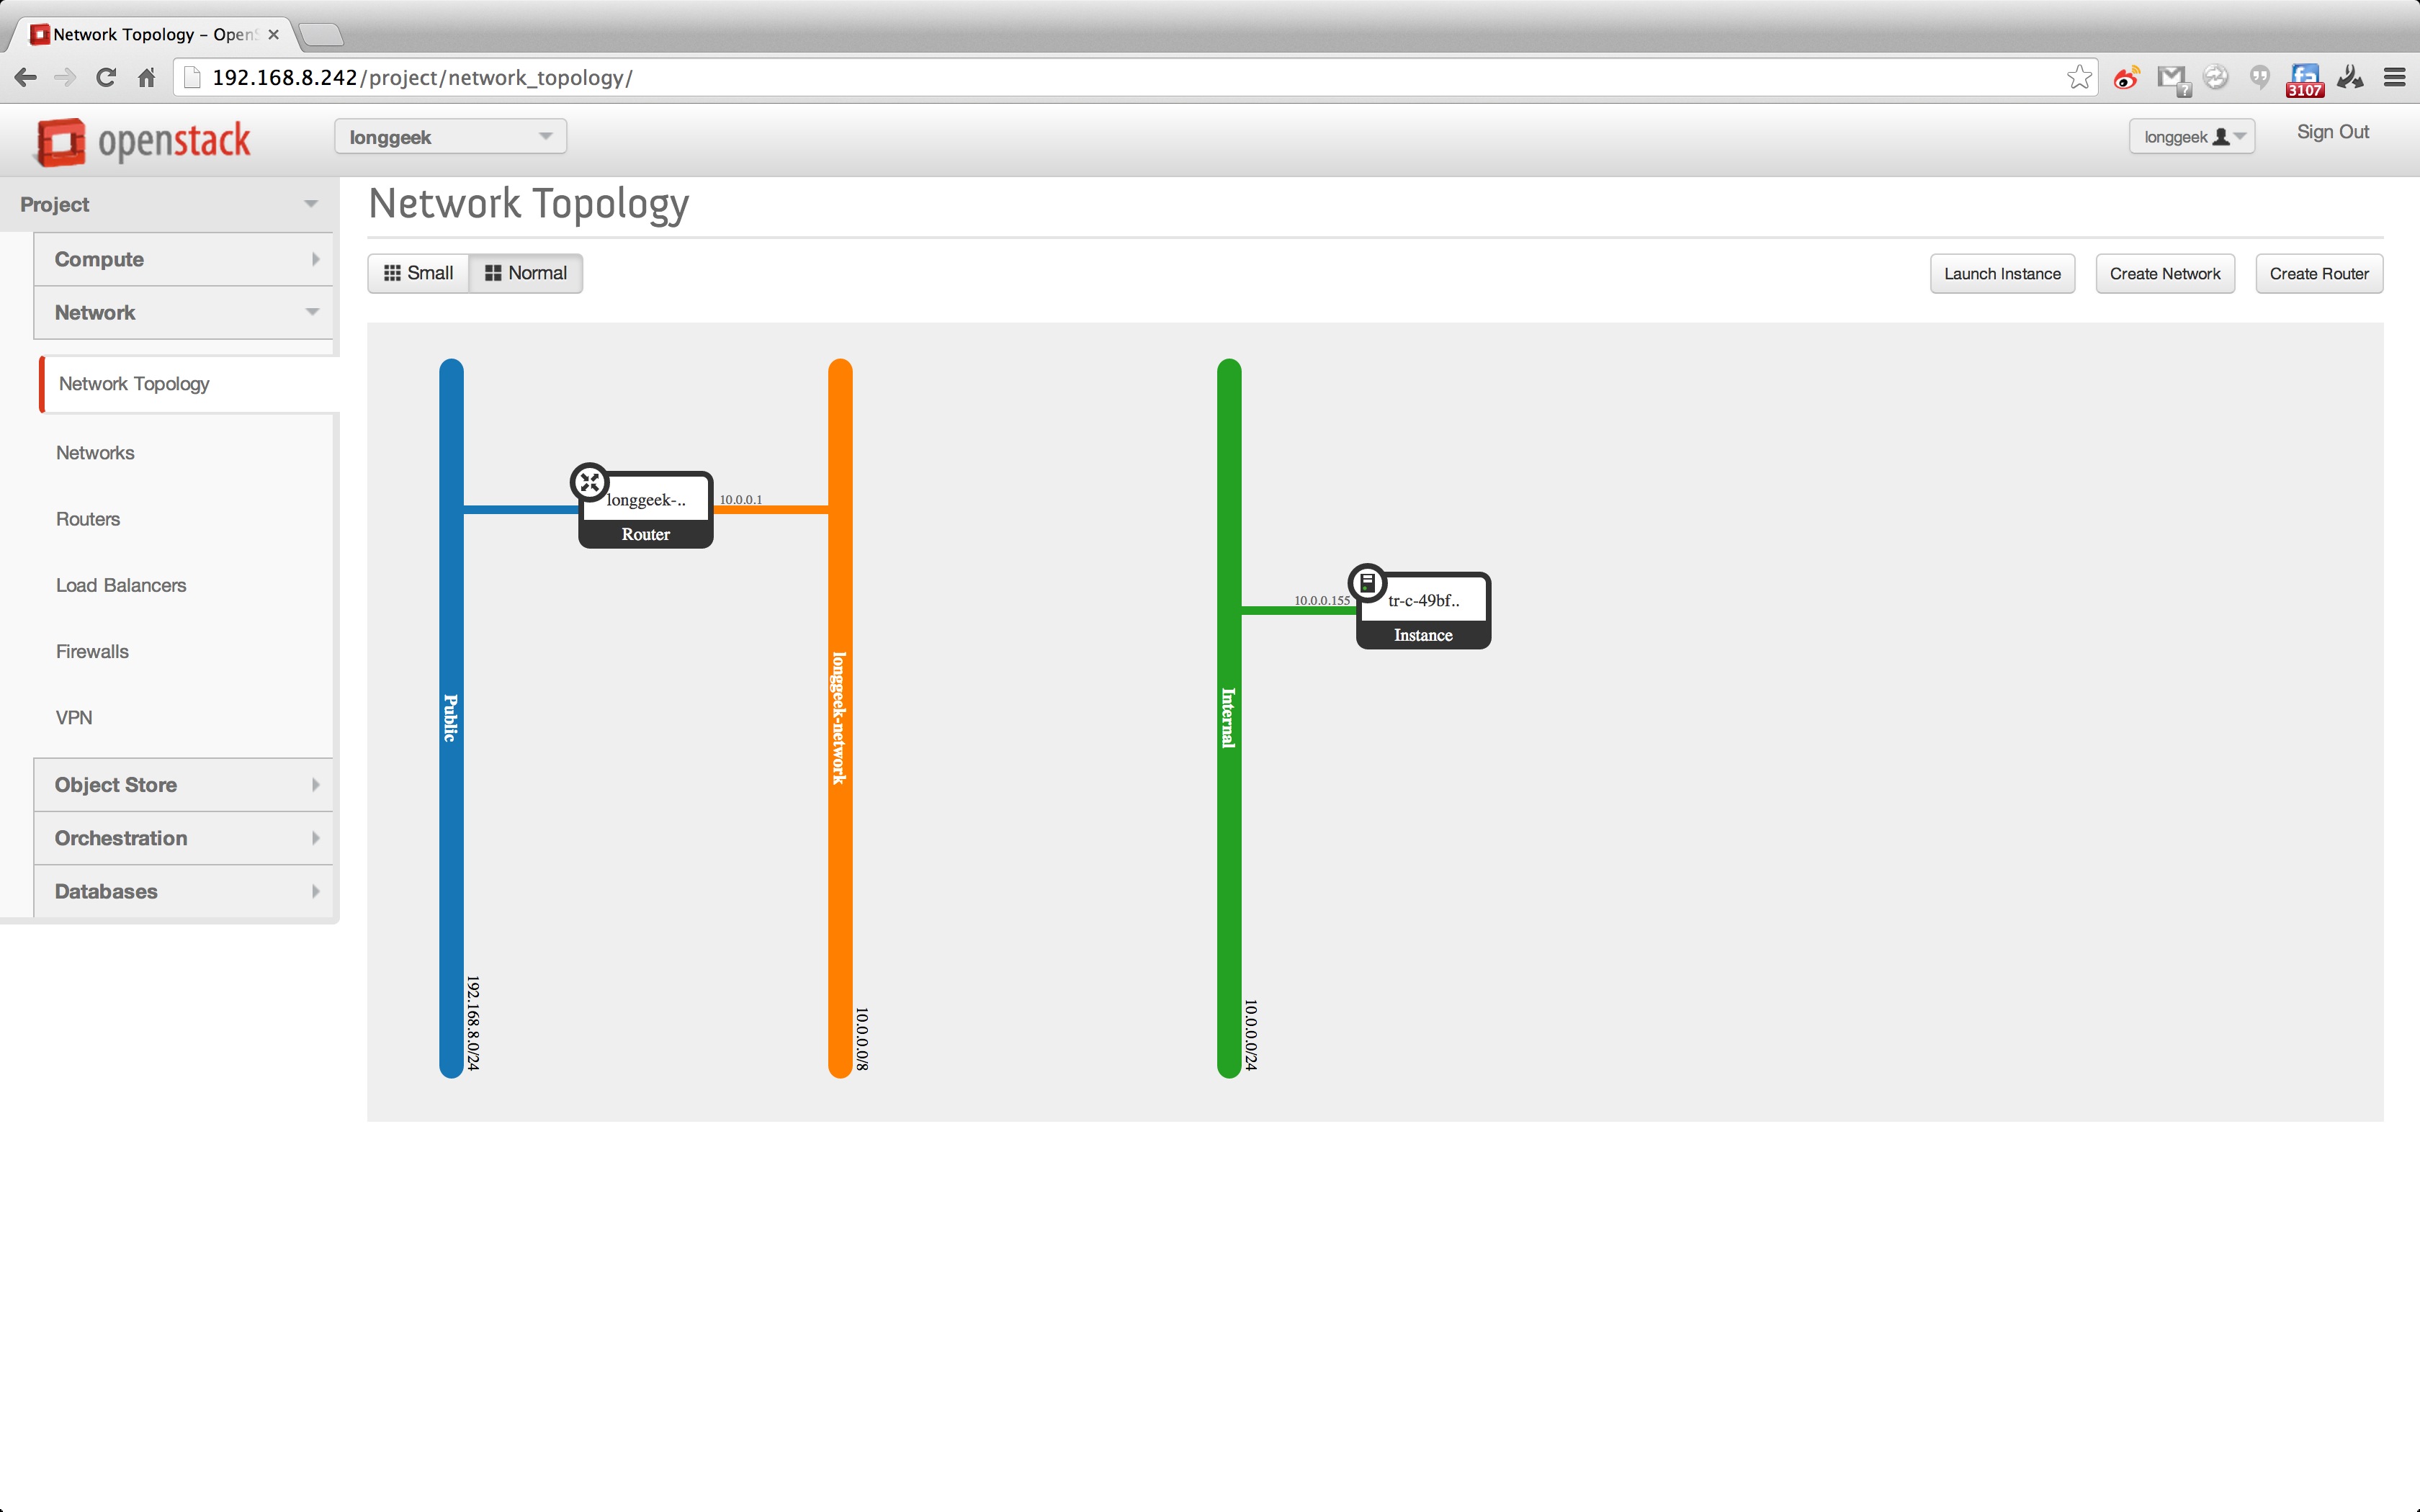
在来看看网络拓扑,绿色名为 Internal 是 admin 用户创建的一个共享内网网络,同时也写在了 trove.conf 中:
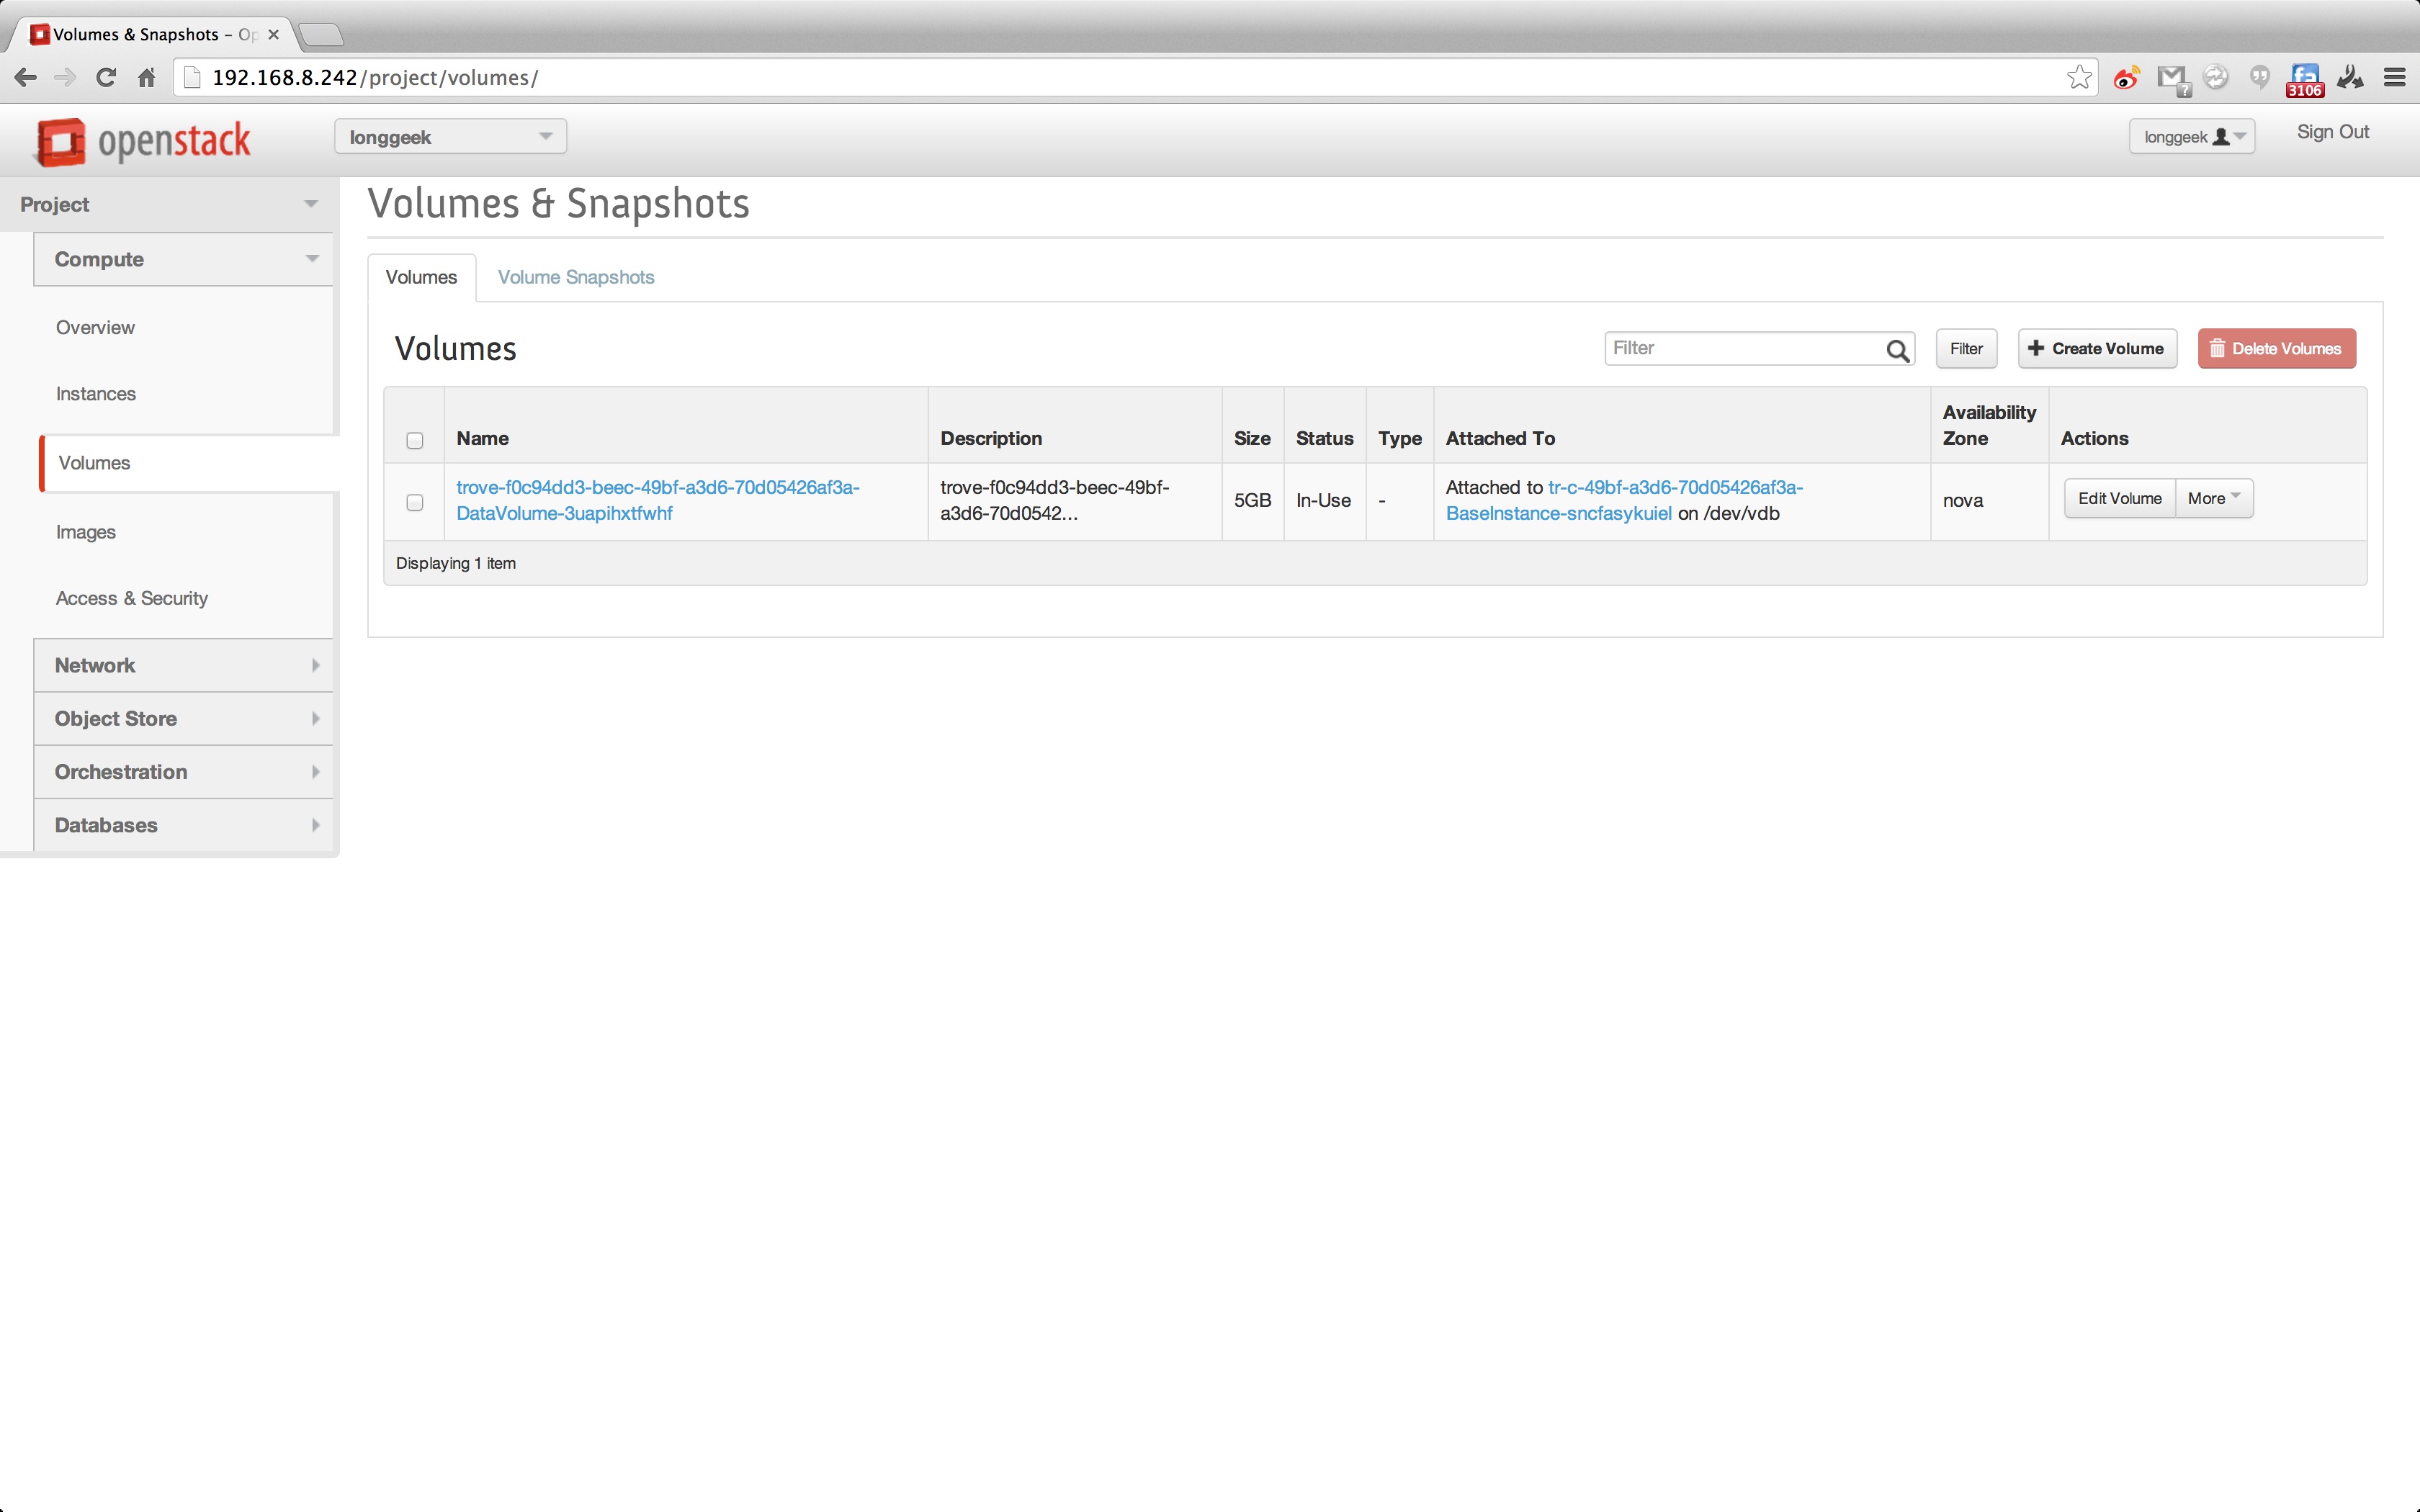
在创建 trove instance 时候,分配了 5G 的 volume 给 vm:
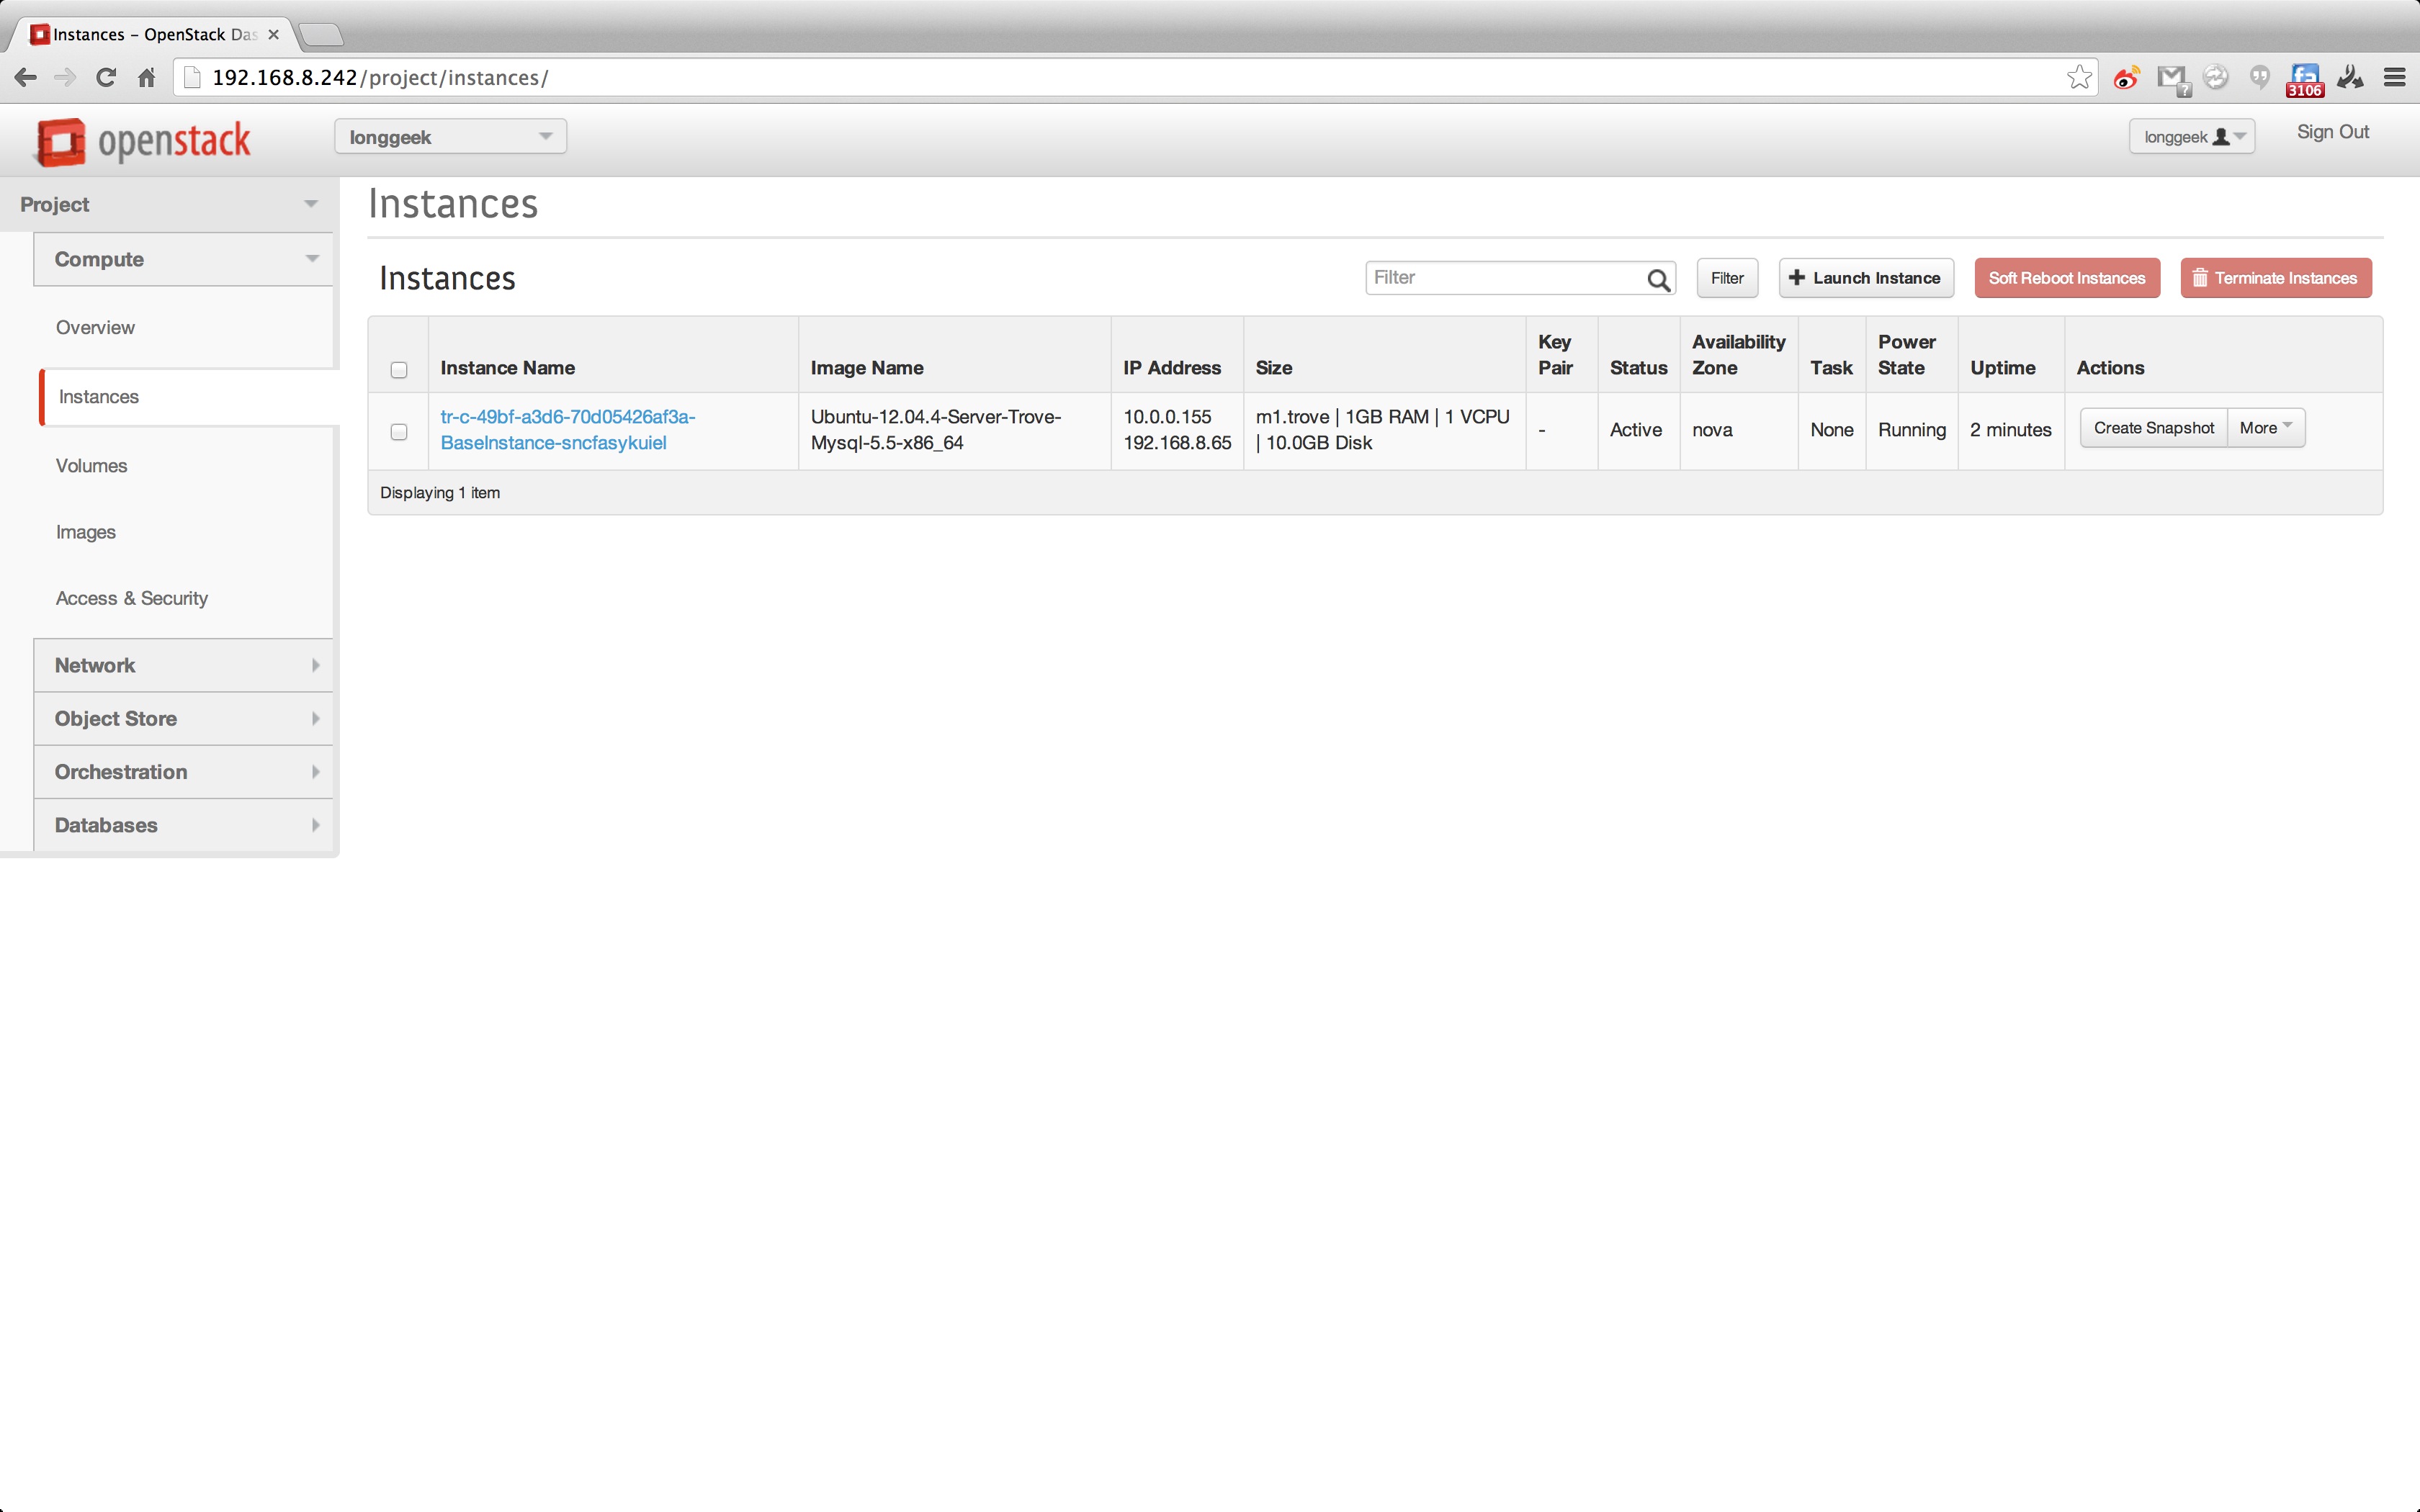
在 nova instance 界面中看到如下:
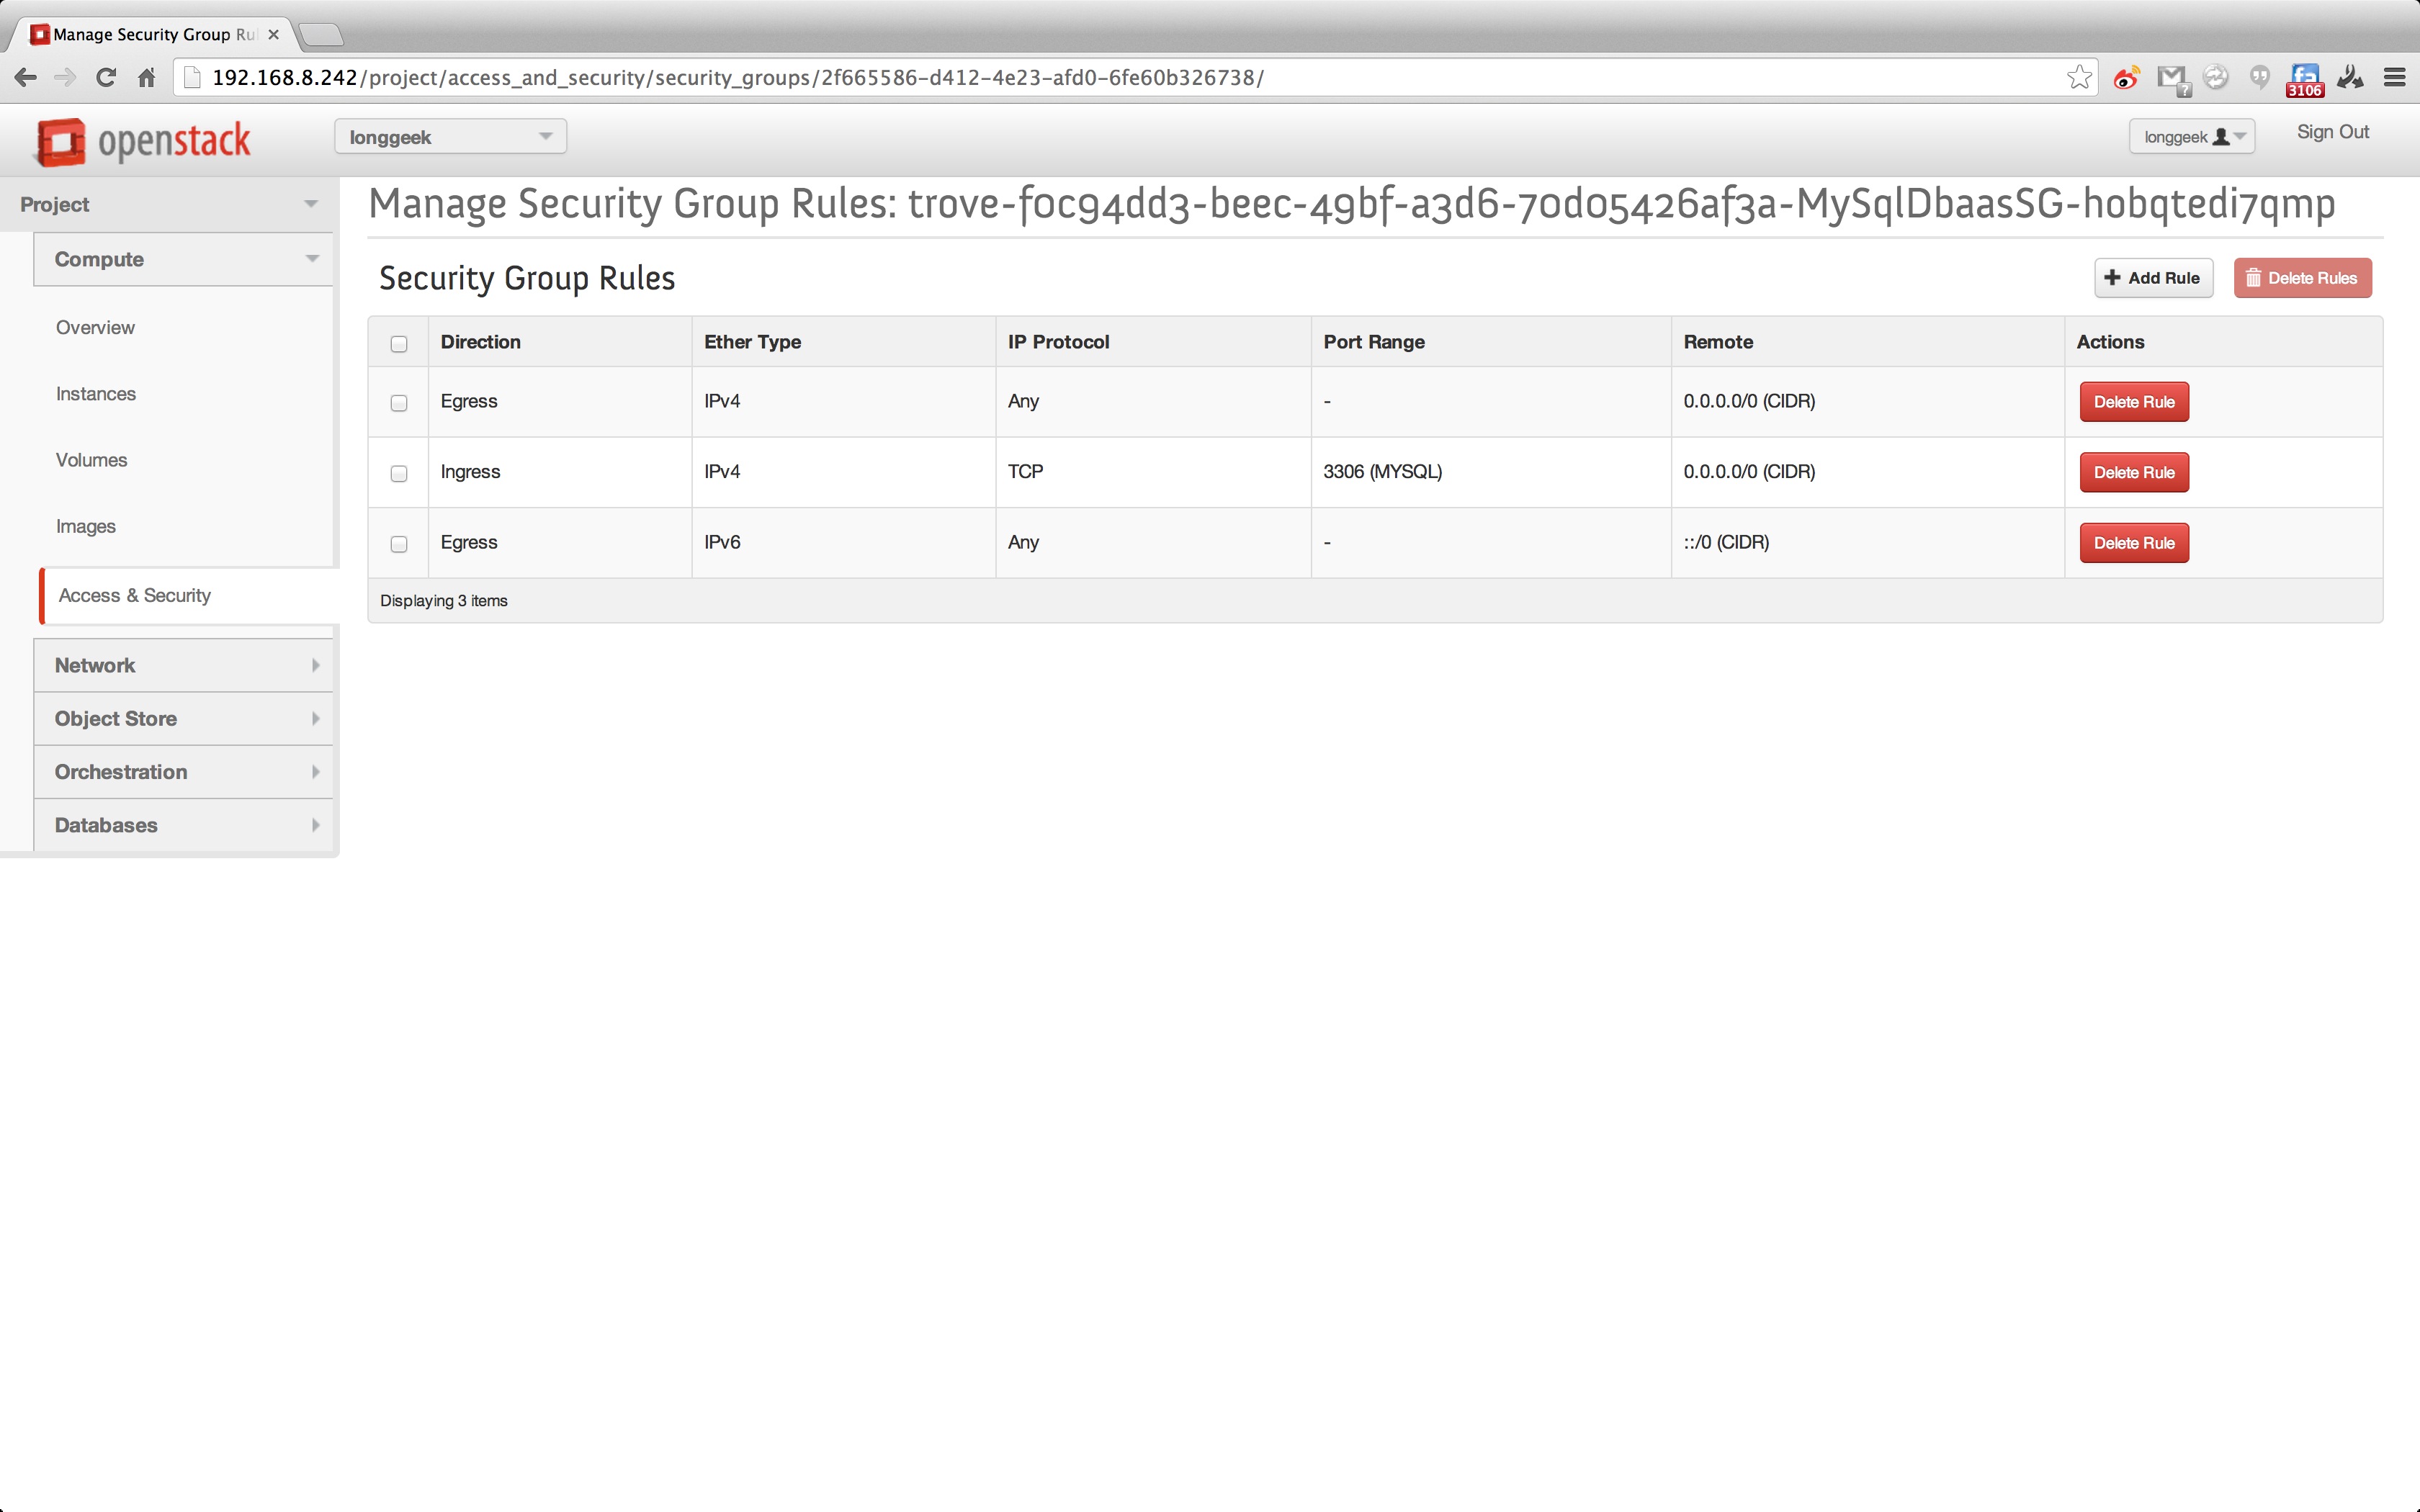
创建 trove instance 时候会自动根据 datastore type 来指定一个单独的安全组,默认开了相关数据库服务端口号:
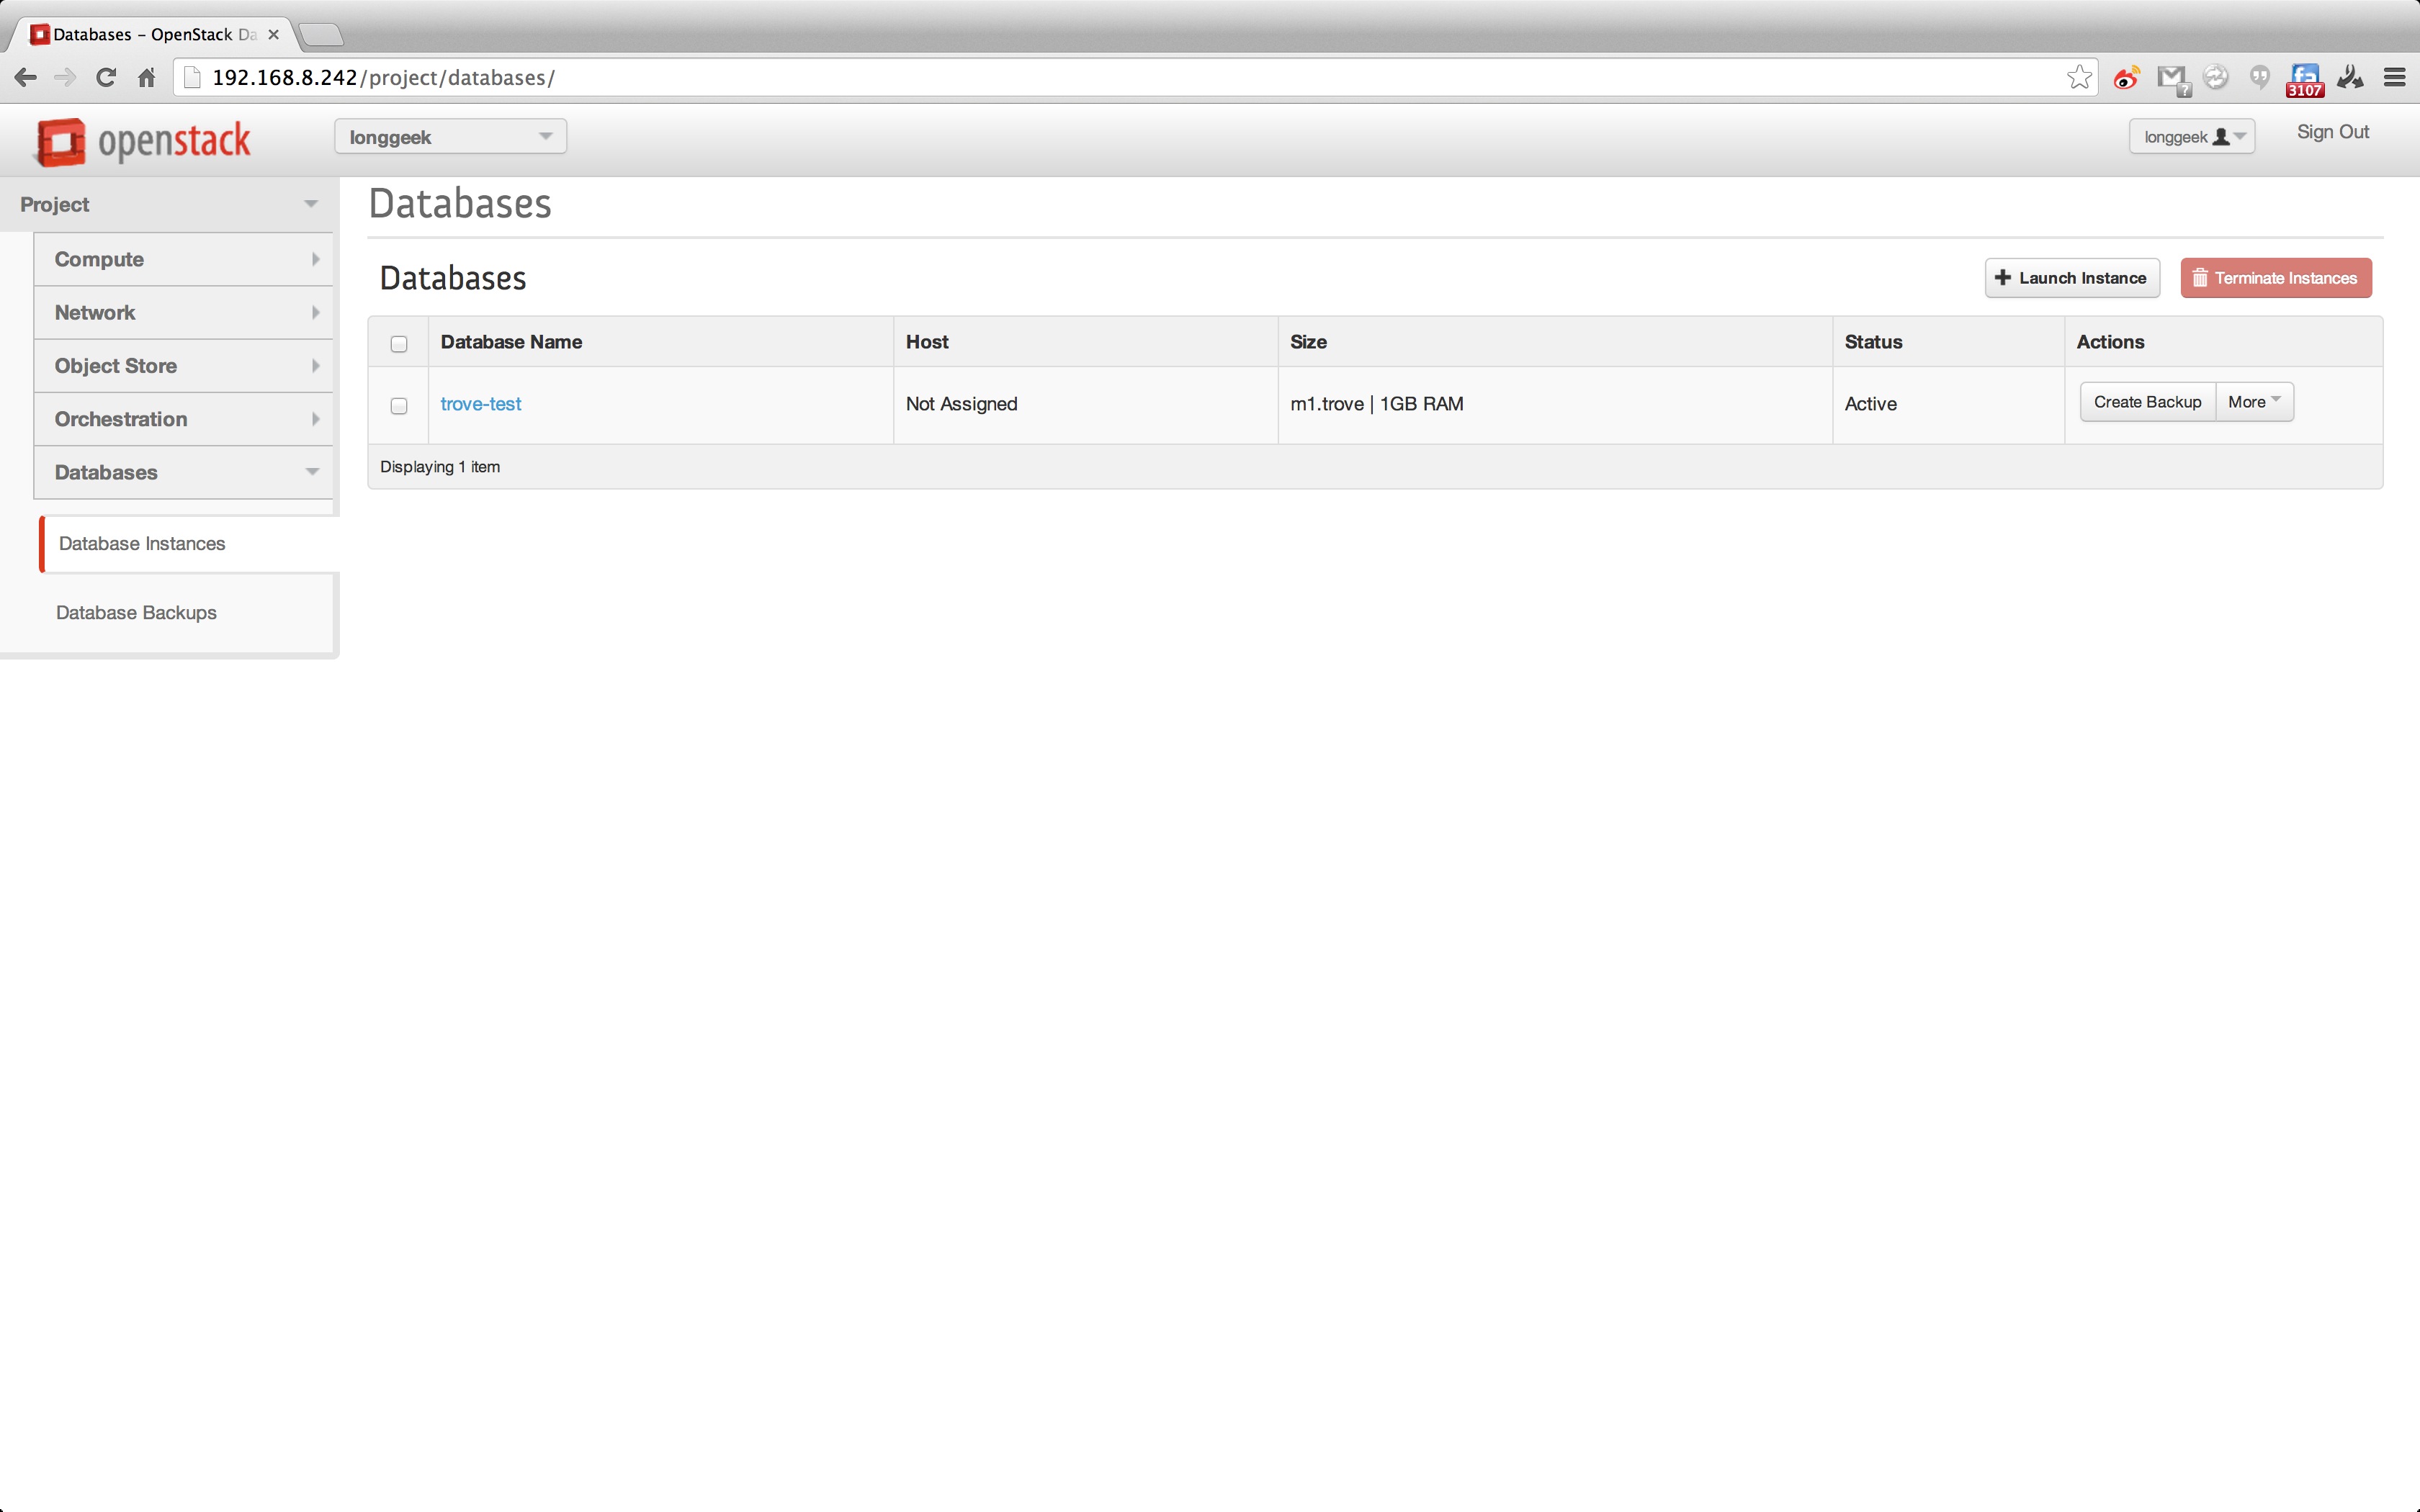
刚才在 nova instance 界面中看到 vm 状态已经 Active,在回到 trove 的 database instance 上看到 vm 还是在 build 中,那就是 vm 正在启动,执行 cloud-init 自动扩展根分区、metadata 以及 heat 模版中自定义的脚本,最后重启了 trove-guestagent 服务,而 trove-guestagent 会监听 rpc 消息队列,trove-guestagent 服务启动后,更新状态为 Running,发送 rpc 消息,taskmanager 收到消息后,发送创建 db 请求,trove-guestagent 收到请求后创建相应 db,最后发送 Active 状态消息给 rpc,trove-taskmanager 收到 Active 消息后,不再发送创建数据库消息,而 trove-conductor 同时收到 trove-guestagent Active 消息后,去数据库里更新 trove instance 的状态,在界面就可以看到 instance Active 的状态了:
现在就可以验证数据库和用户到底有没有创建成功,heat 模版会自动给 instance 添加 floating ip,可以通过 floating ip 连接到数据库:
- longgeek:~ Longgeek$ mysql -ulonggeek -ppassword -h 192.168.8.65
- Warning: Using a password on the command line interface can be insecure.
- Welcome to the MySQL monitor. Commands end with ; or \g.
- Your MySQL connection id is 55
- Server version: 5.5.37-0ubuntu0.12.04.1 (Ubuntu)
-
- Copyright (c) 2000, 2013, Oracle and/or its affiliates. All rights reserved.
-
- Oracle is a registered trademark of Oracle Corporation and/or its
- affiliates. Other names may be trademarks of their respective
- owners.
-
- Type 'help;' or '\h' for help. Type '\c' to clear the current input statement.
-
- mysql> show databases;
- +-------------------------+
- | Database |
- +-------------------------+
- | information_schema |
- | dbname1 |
- | dbname2 |
- | dbname3 |
- | dbname4 |
- +------------------------+
- 5 rows in set (0.01 sec)
-
- mysql>
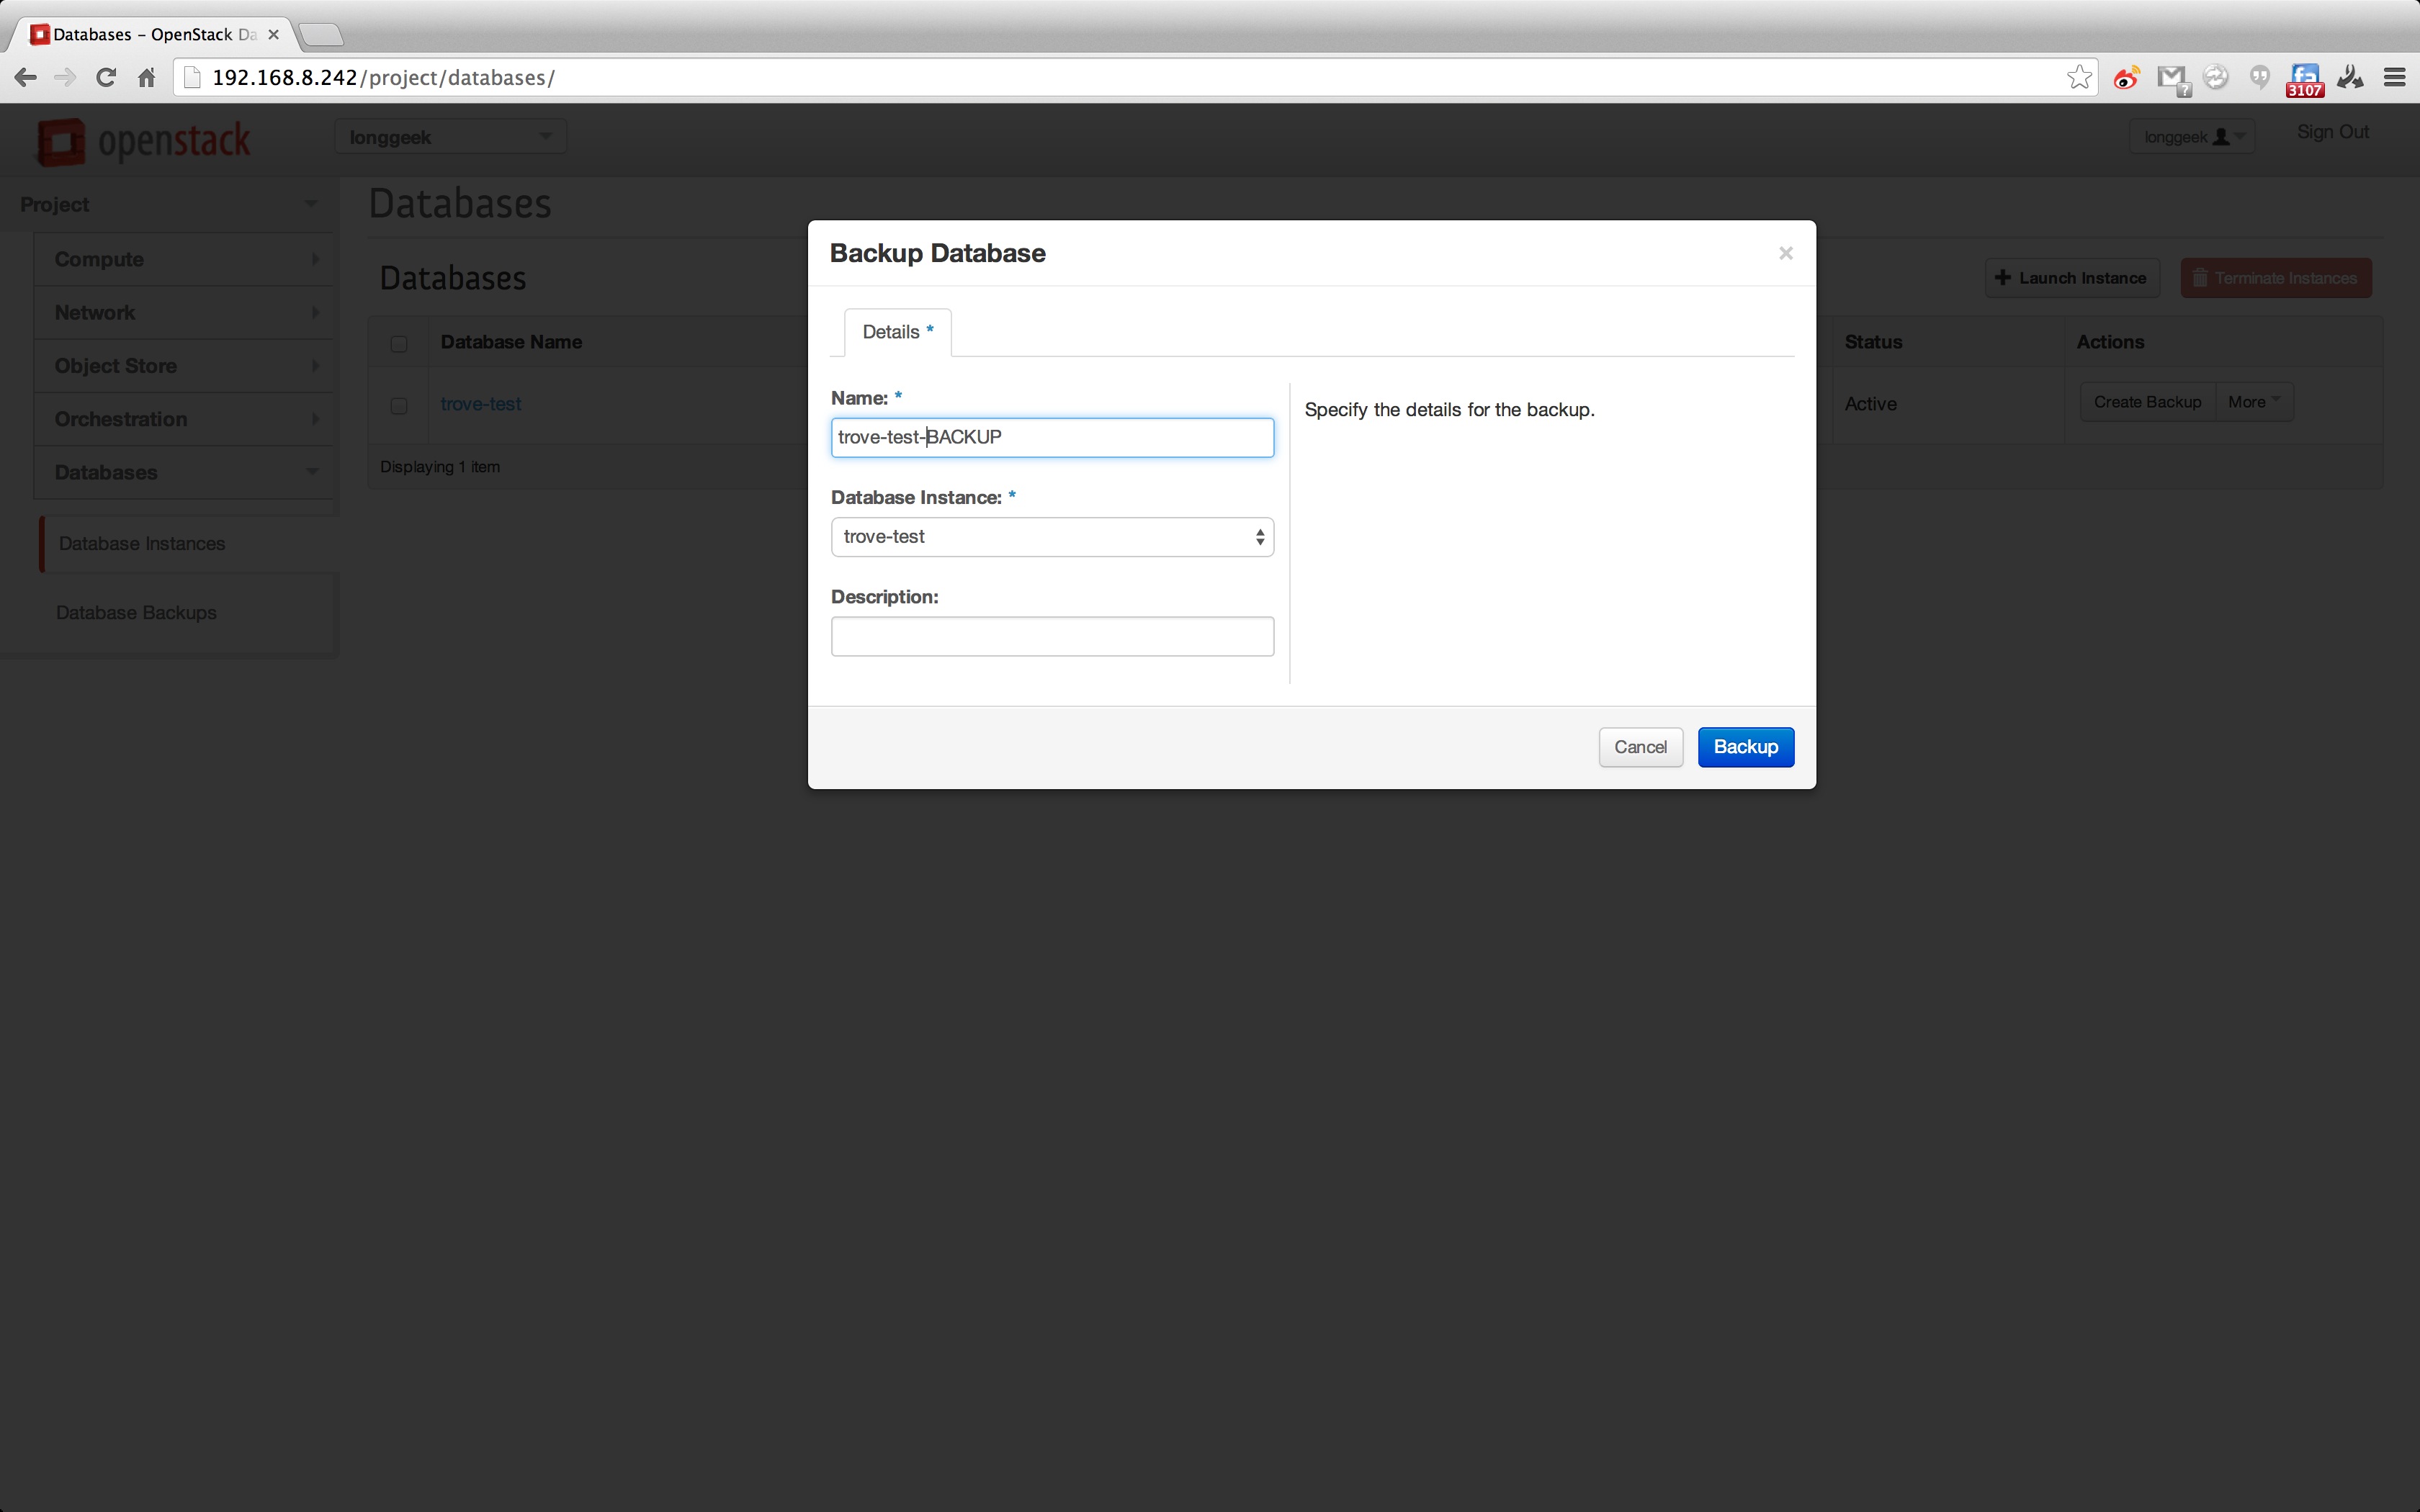
在来看看备份操作,输入一个备份名字、选择备份的 trove instance:
trove-guestagent 会执行命令去备份数据库:
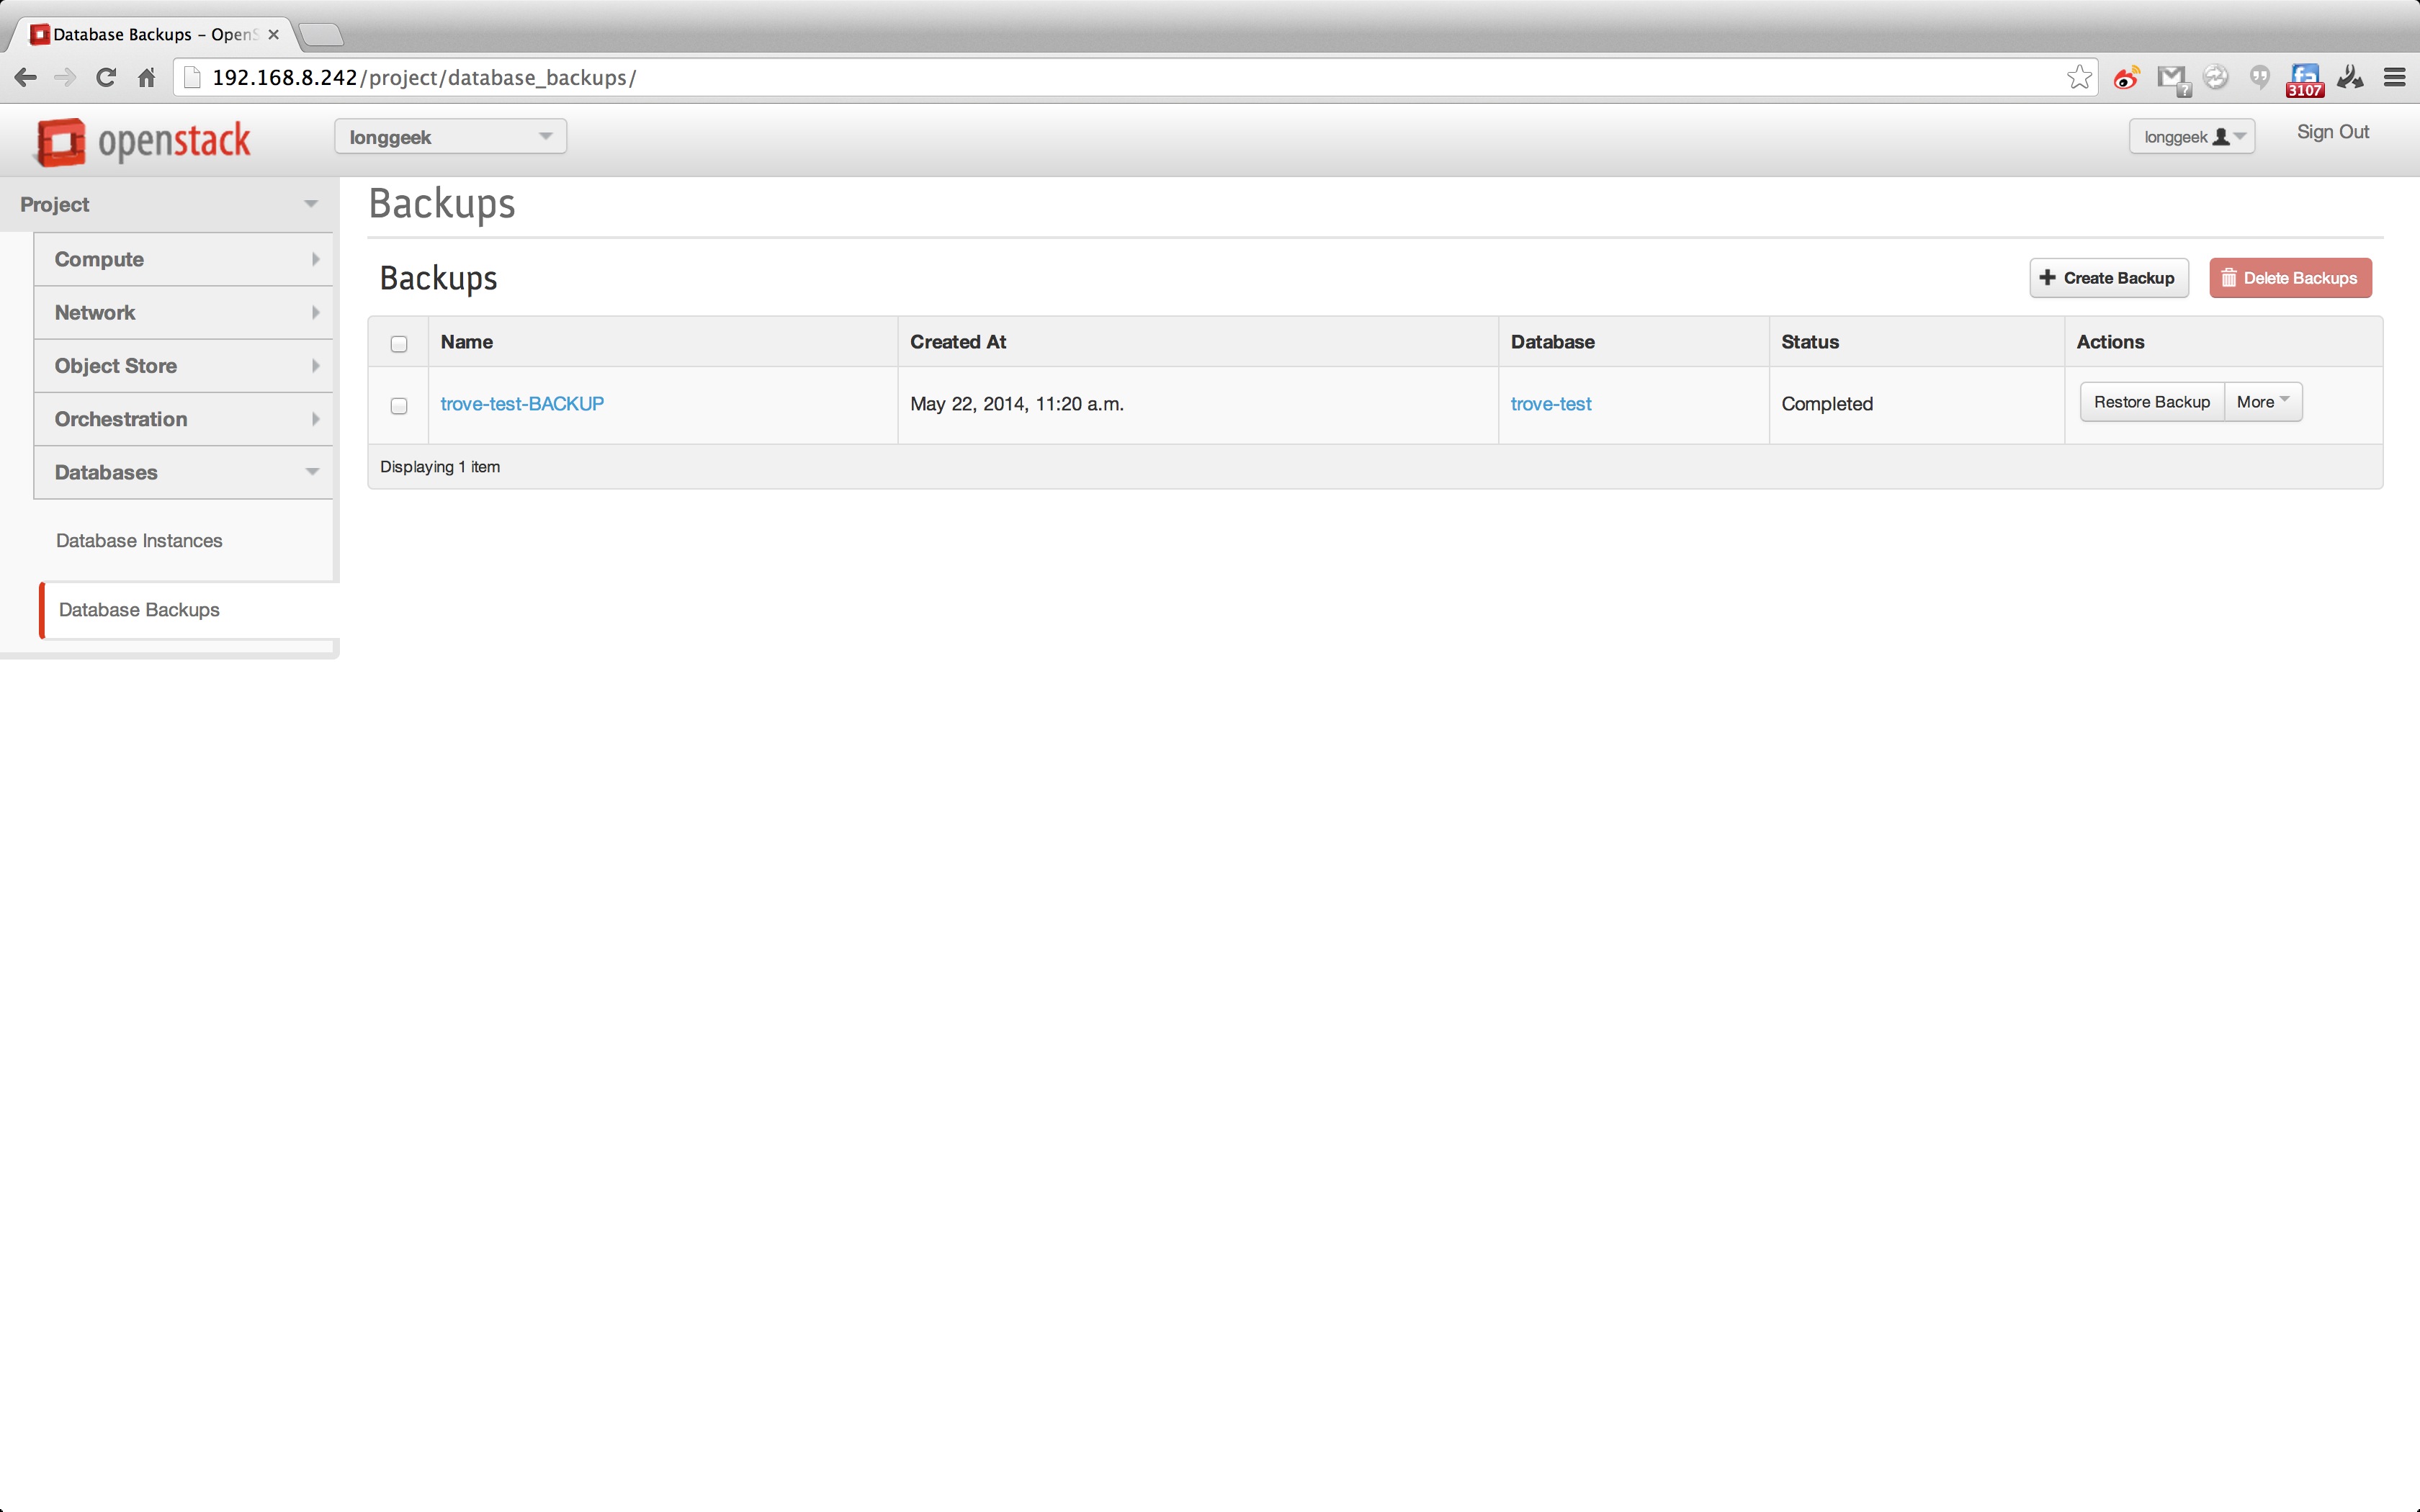
默认备份的数据是放在了 swift 对象存储上,增加了数据的冗余性:
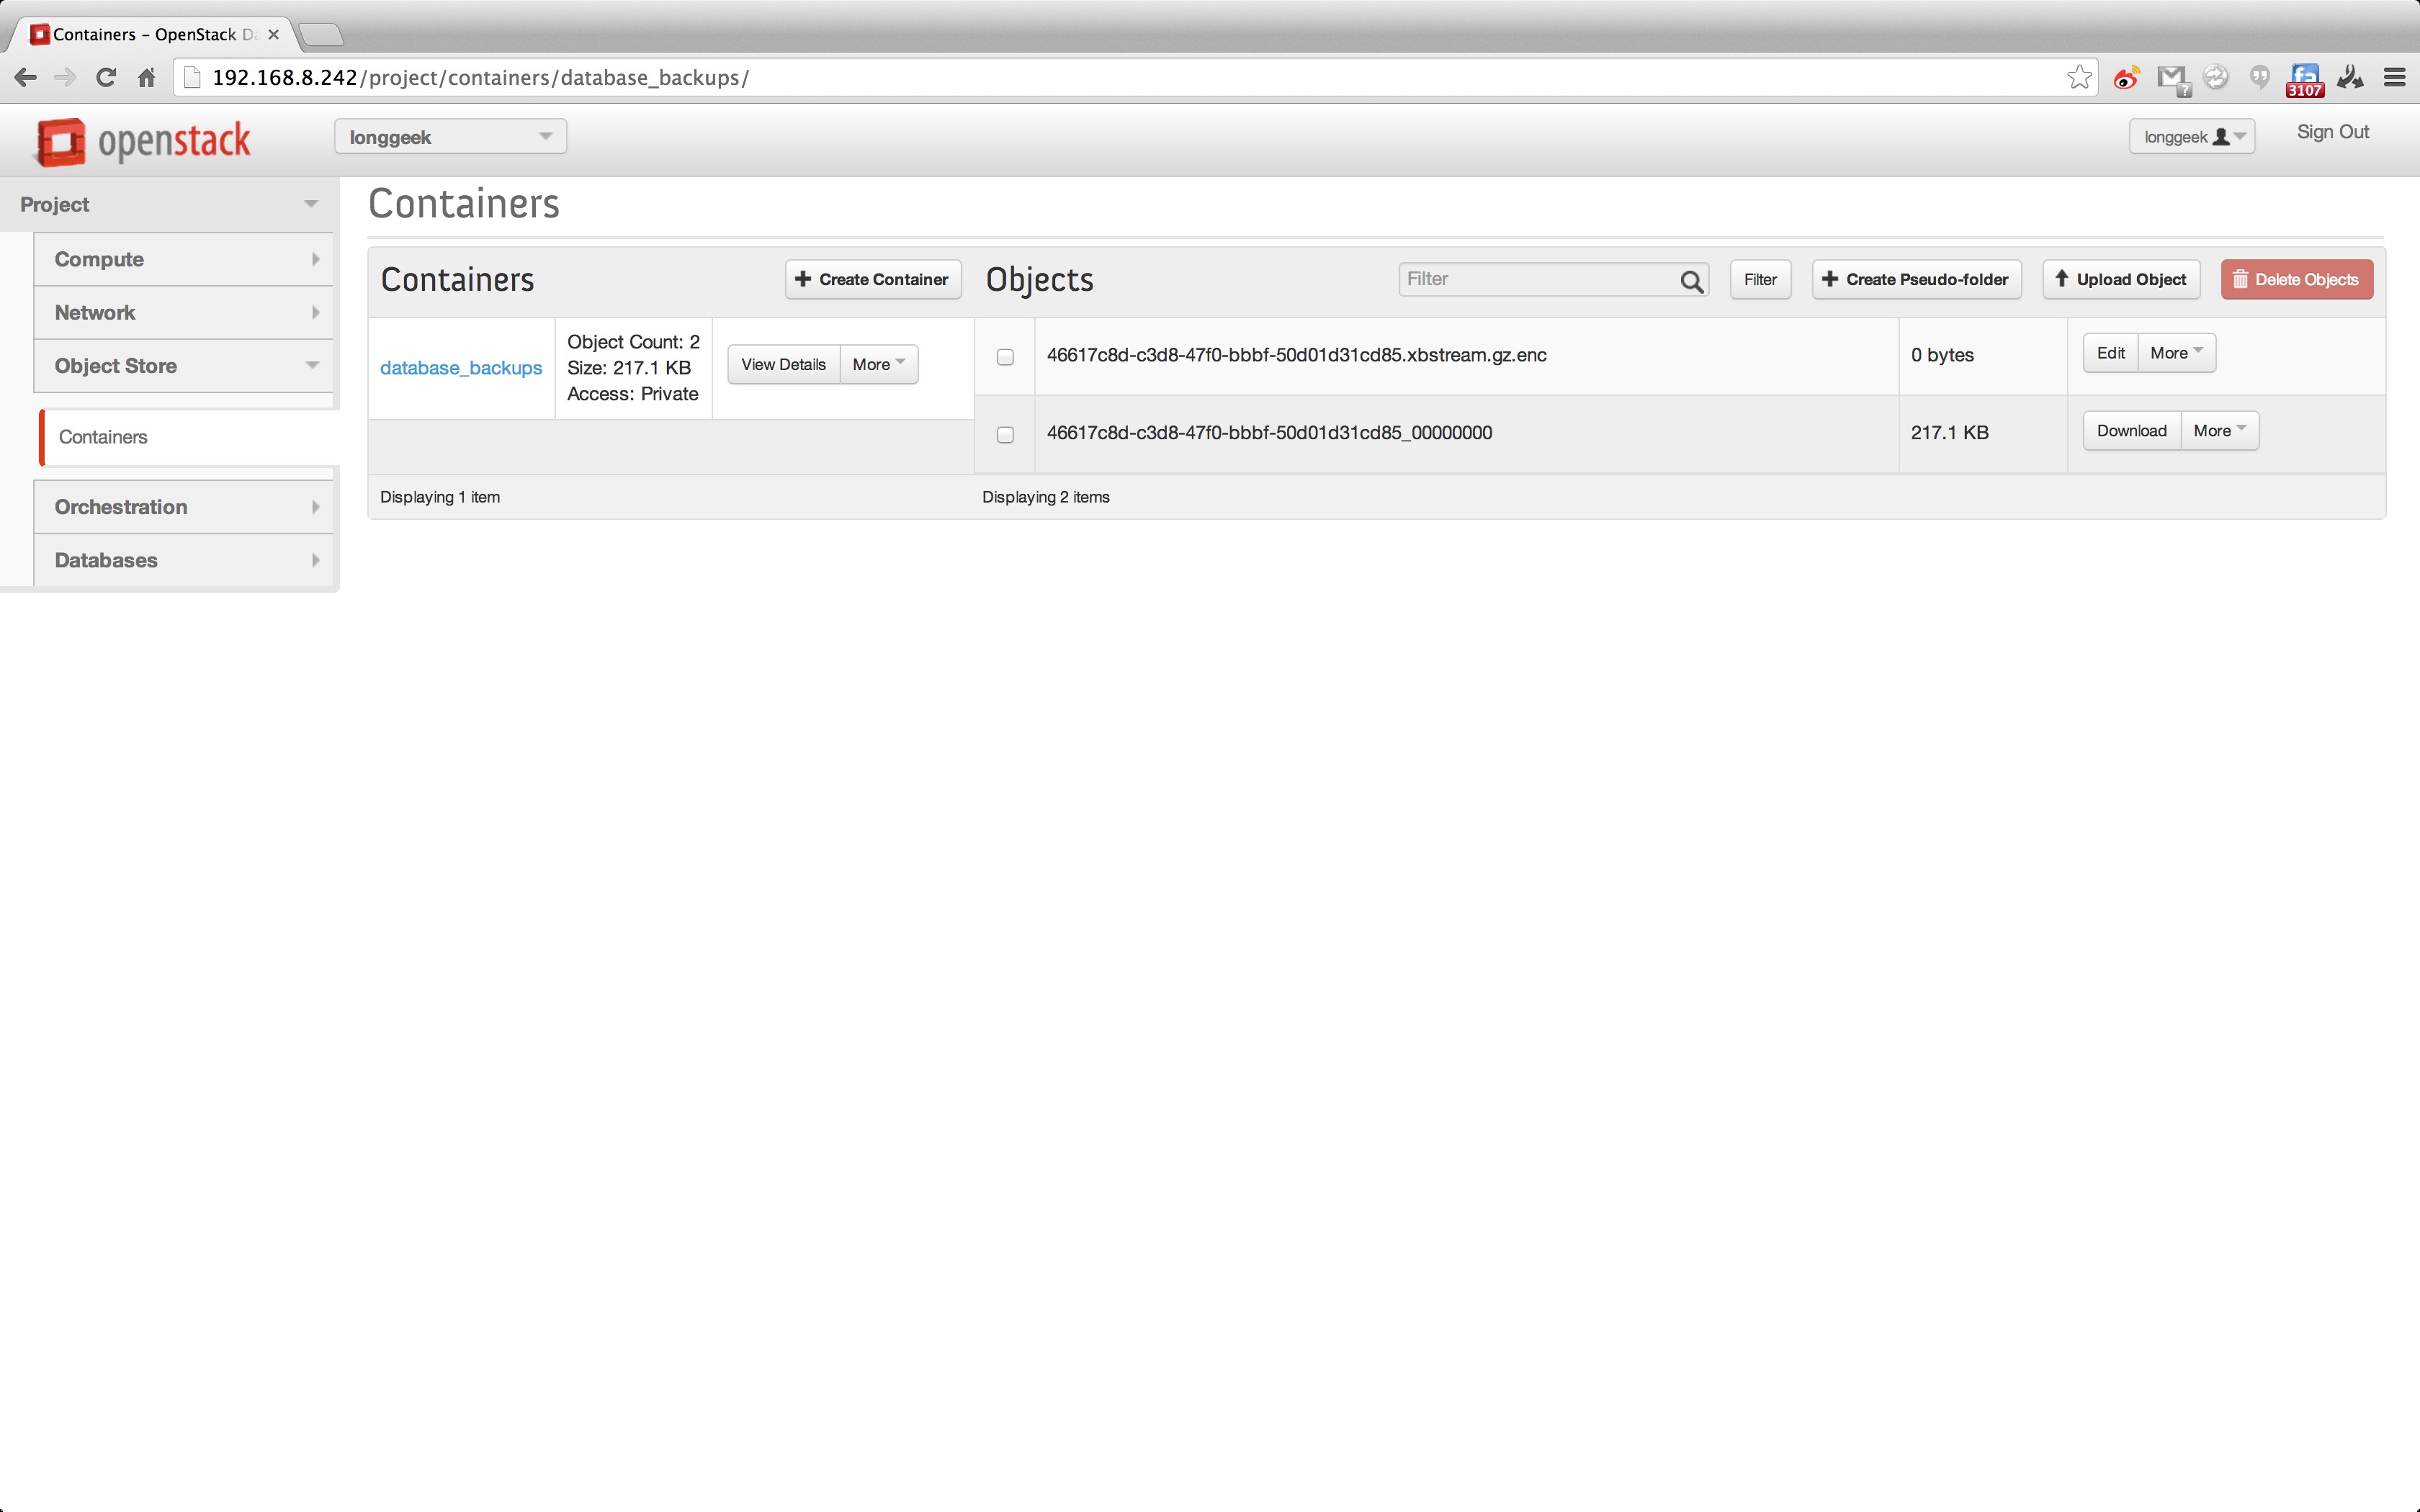
trove-guestagent 需要使用 keystone、amqp、swift,所在在创建 keystone、swift 的 endpoint 时候别弄成 127.0.0.1。
至于其它类型的数据库,还没有来得及做测试,后期有时间会记录一下。
##################################################################################
本文转自:http://longgeek.com/2014/05/22/source-installation-openstack-icehouse-trove-project/
参考文献与资料:
1.DBaaS与Trove:
http://www.wzxue.com/dbaas%E4%B8%8Etrove/
|  /2
/2 